> ## Documentation Index
> Fetch the complete documentation index at: https://docs.m3ter.com/llms.txt
> Use this file to discover all available pages before exploring further.
# Creating Salesforce Integration Credentials
This topic explains how to create Integration Credentials which you can then use to connect Salesforce Integrations with your Salesforce system. See [Configuring Salesforce Entity Data Sync Integrations](/guides/integrations/setting-up-integrations/configuring-sf-entity-data-integrations).
**Warning: Create External Client App in Salesforce First!** To create a Salesforce Integration Credential, you'll first need to create and configure an External Client App in Salesforce. For more details, please see the [Salesforce documentation](https://help.salesforce.com/s/articleView?id=xcloud.create_a_local_external_client_app.htm\&type=5) on how to do this. Also, note that the External Client App needs to be set up for the Client Credentials Flow - see the [Salesforce Documentation](https://help.salesforce.com/s/articleView?id=xcloud.configure_client_credentials_flow_for_external_client_apps.htm\&type=5) for more details. Please ensure that when configuring your External Client App, you select the required **OAuth Scopes**:
* Manage user data via APIS (api)
* Perform requests at any time (refresh\_token, offline\_access)
**To create Salesforce integration Credentials:**
1. Select **m3sh**:
 The **Workflows** page opens.
2. Select **Integrations**. The **Integrations** page opens.
3. Select **Salesforce**. The **Salesforce Integrations** page opens.
4. On the **Credentials** panel, select **Configure new credentials**:
The **Workflows** page opens.
2. Select **Integrations**. The **Integrations** page opens.
3. Select **Salesforce**. The **Salesforce Integrations** page opens.
4. On the **Credentials** panel, select **Configure new credentials**:
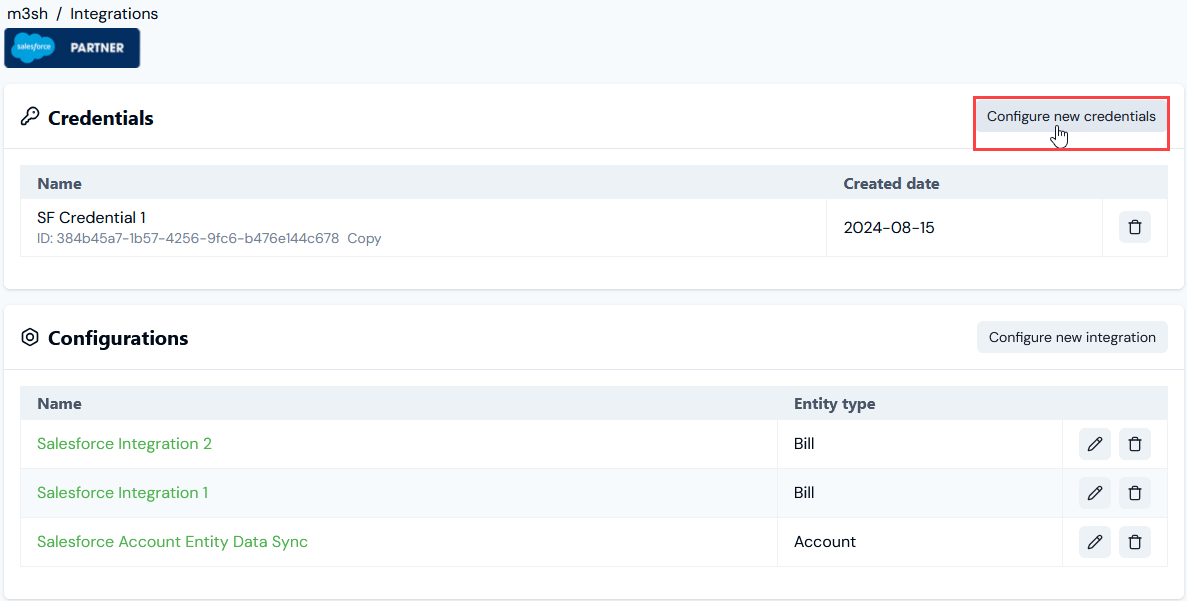 The **Create** pages opens.
5. Under **Credential details** enter:
* **Name**. Descriptive name for the Credential.
* **Destination**. This will be pre-selected for **Salesforce**.
* **Subdomain**. The subdomain of your Salesforce Org. For example, if you access Salesforce using *MyDomainName.my.salesforce.com*, then your subdomain would be *MyDomainName*.
* **Consumer key**. The consumer key obtained from the External Client App configured in Salesforce.
* **Consumer secret**. The consumer secret obtained from the External Client App configured in Salesforce.
6. Select **Create credential**. You are returned to the **Salesforce Integrations** page where the new Credential is listed on the **Credentials** panel:
The **Create** pages opens.
5. Under **Credential details** enter:
* **Name**. Descriptive name for the Credential.
* **Destination**. This will be pre-selected for **Salesforce**.
* **Subdomain**. The subdomain of your Salesforce Org. For example, if you access Salesforce using *MyDomainName.my.salesforce.com*, then your subdomain would be *MyDomainName*.
* **Consumer key**. The consumer key obtained from the External Client App configured in Salesforce.
* **Consumer secret**. The consumer secret obtained from the External Client App configured in Salesforce.
6. Select **Create credential**. You are returned to the **Salesforce Integrations** page where the new Credential is listed on the **Credentials** panel:
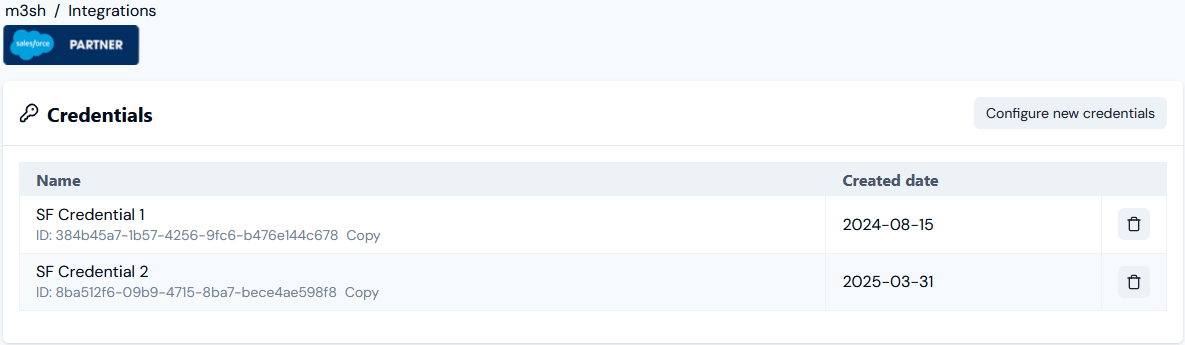 * The Credential is now available for connecting your Integrations with Salesforce. See [Configuring Salesforce Entity Data Sync Integrations>Setting Up Authentication for the Integration](/guides/integrations/setting-up-integrations/configuring-sf-entity-data-integrations#setting-up-authentication-for-the-integration).