> ## Documentation Index
> Fetch the complete documentation index at: https://docs.m3ter.com/llms.txt
> Use this file to discover all available pages before exploring further.
# Exporting and Importing Workflows
If you've built and published a Workflow and want to use the Workflow as the basis for another Workflow by adapting the current Workflow to serve a different operational use case, you can export the Workflow and import it as a new one.
**Note:** you can export a Workflow from one Organization and import it into a different Organization if required.
**To export and import a m3sh Workflow:**
1. Select **m3sh**:
 * The **Workflows** page opens.
2. Select the **Name** text of the Workflow you want to export. The Workflow opens in **Draft** mode.
**Check Published version!** The **Published** version of the Workflow will be exported. If you have made any changes to the Workflow **Draft** version since you last published it and you want to include those recent changes when you export, you must re-publish the current **Draft** first.
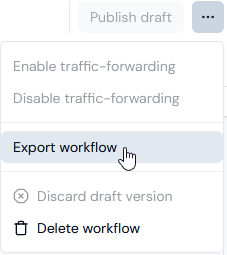
3. On the drop-down menu, select **Export workflow**:
* The **Workflows** page opens.
2. Select the **Name** text of the Workflow you want to export. The Workflow opens in **Draft** mode.
**Check Published version!** The **Published** version of the Workflow will be exported. If you have made any changes to the Workflow **Draft** version since you last published it and you want to include those recent changes when you export, you must re-publish the current **Draft** first.
3. On the drop-down menu, select **Export workflow**:
 An **Export workflow** panel opens:
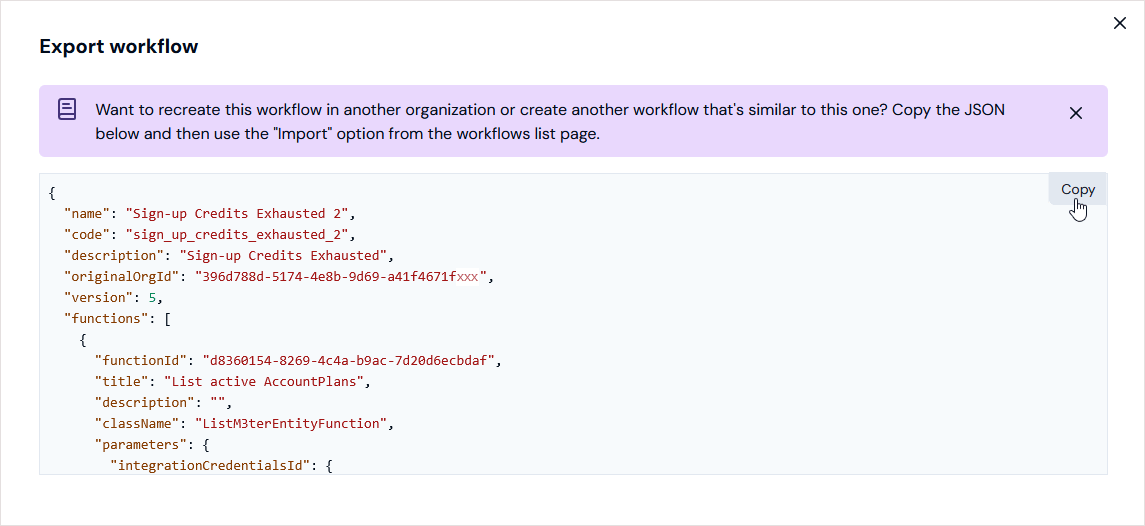 Note that you can:
* Review a help text.
* Scroll down the Workflow JSON to review it before proceeding with the export.
4. Select **Copy** and close the **Export workflow** panel.
5. Go back to the **Workflows** page and select **Create workflow>Import workflow**:
Note that you can:
* Review a help text.
* Scroll down the Workflow JSON to review it before proceeding with the export.
4. Select **Copy** and close the **Export workflow** panel.
5. Go back to the **Workflows** page and select **Create workflow>Import workflow**:
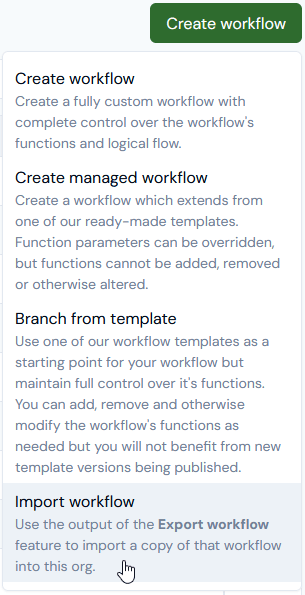 An **Import workflow** panel opens.
6. Paste the Workflow JSON you copied from the **Export workflow** panel into the **Import workflow** panel:
An **Import workflow** panel opens.
6. Paste the Workflow JSON you copied from the **Export workflow** panel into the **Import workflow** panel:
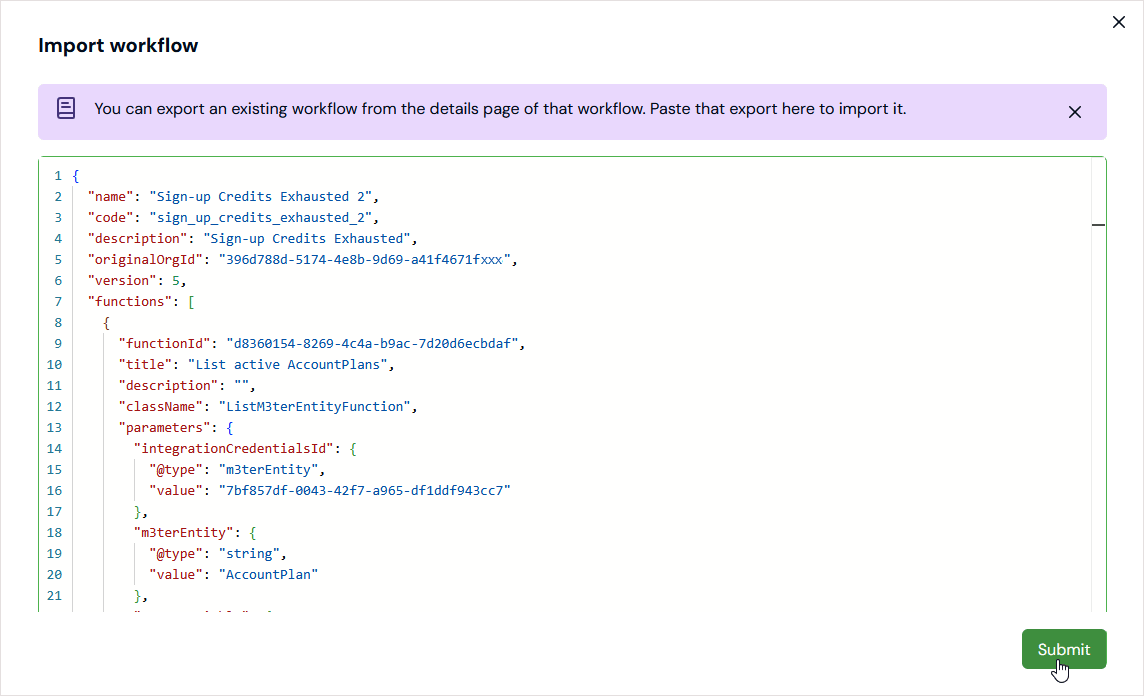 7. Select **Submit**. The **Import workflow** panel closes and a message shows to confirm that the Workflow was imported successfully:
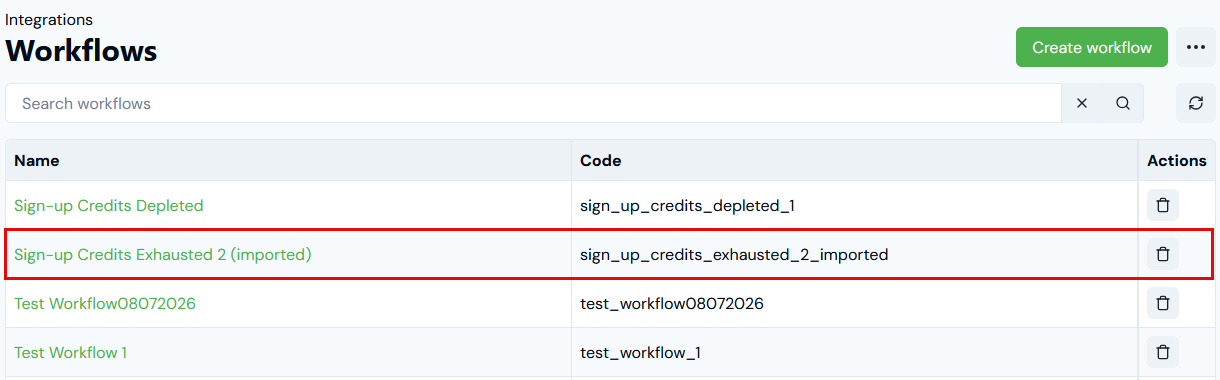 * The imported Workflow is now listed on the **Workflows** page with "imported" appended to the **Name** and **Code** of the original Workflow.
* You can now open the new imported Workflow, edit the **Name** and **Code**, and modify it as required.
* The imported Workflow is now listed on the **Workflows** page with "imported" appended to the **Name** and **Code** of the original Workflow.
* You can now open the new imported Workflow, edit the **Name** and **Code**, and modify it as required.