> ## Documentation Index
> Fetch the complete documentation index at: https://docs.m3ter.com/llms.txt
> Use this file to discover all available pages before exploring further.
# Utilizing Workflow Managed Templates
You can create Workflows using pre-built templates, which are designed to fulfill specific automation use cases. Workflow templates are designed and an managed by the platform to ensure reliability and consistency. When you create a Workflow from a template, editing is restricted and you won't be able to alter the main design flow by adding or removing functions. However, you will be able to edit functions to provide required parameters to suit the particular Workflow instance such as adding any required credentials.
This topic explains how to utilize Workflow managed templates by providing a worked example of creating a Workflow to automate usage data ingest into the m3ter platform:
* [Worked Example](#worked-example)
* [Prerequisites](#prerequisites)
* [Creating a Workflow from a Managed Template](#creating-a-workflow-from-a-managed-template)
* [Adding and Configuring a Webhook Trigger](#adding-and-configuring-a-webhook-trigger)
If you want to utilize a Workflow managed template but avoid the editing restrictions imposed on your Workflow instance, you can instead branch from a managed template:
* [Branching from a Managed Template](#branching-from-a-managed-template)
**Review First!** Before attempting to follow this worked example and create a m3sh Workflow based on a managed template, please review the earlier topics in this section introducing [Workflow Key Concepts and Options](/guides/m3sh-workflows/m3sh-workflows-key-concepts-and-options) and the [Workflow Builder](/guides/m3sh-workflows/getting-to-know-the-workflow-builder).
## Worked Example
If your operational use case for ingesting customer usage data into the m3ter platform calls for a file upload from data files stored in an AWS S3 bucket, you can utilize the **Submit measurements from S3 source with SNS Trigger** Workflow managed template designed to meet this requirement:
* Uses an Incoming Webhook trigger that exploits the AWS Simple Notification Service (SNS) - a Workflow run is triggered when a file is uploaded to the designated AWS S3 bucket.
* When triggered, the Workflow reads the file's content, applies transformations on the usage data, and ingests the data into the m3ter platform via the m3ter File Upload service.
**Warnings and Notes!**
* **Slow throughput**. m3sh Workflows are slow to process so using this managed template to implement a usage data ingest solution doesn’t in any way align with the current ingest Service Level Agreements (SLAs) and is NOT recommended as a valid solution for high throughput ingest scenarios.
* **Troubleshooting**. Using a Workflow for usage data ingest introduces an additional point of failure. If something fails *before* the file is processed by the Workflow, you will need to look for the causes of failure as an integration error event, not an ingest error one.
## Prerequisites
To complete the configuration and setup for a usage data ingest Workflow based on the **Submit measurements from S3 source with SNS Trigger** Workflow managed template, you'll need to perform some prerequisite work:
* [Setting Up Credentials](#setting-up-credentials)
* [Checking Usage Data Files](#checking-usage-data-files)
### Setting Up Credentials
you must first create required Credentials in your m3ter Organization:
* [Creating Incoming Webhook Credential for AWS SNS Request](#creating-incoming-webhook-credential-for-aws-sns-request)
* [Creating AWS Service Credential](#creating-aws-service-credential)
#### Creating Incoming Webhook Credential for AWS SNS Request
In the m3ter Console, open the **Settings>Integrations** page and select the **Credentials** tab. From there you can create an AWS SNS Request Incoming Webhook Credential:
* Enter a **Name** for the Credential and for **Destination**, select **m3sh Workflow**.
* For **Type** select **AWS SNS request**.
* For **Topic arn**, enter the relevant Amazon Resource Name in the standard format including `region` and `account-id`. For example:
`arn:aws:sns:eu-west-2:441235399388:m3sh-measurements`
* Select **Create credential**. The new Incoming Webhook Credential is listed on the **Integrations** page under **Credentials**:
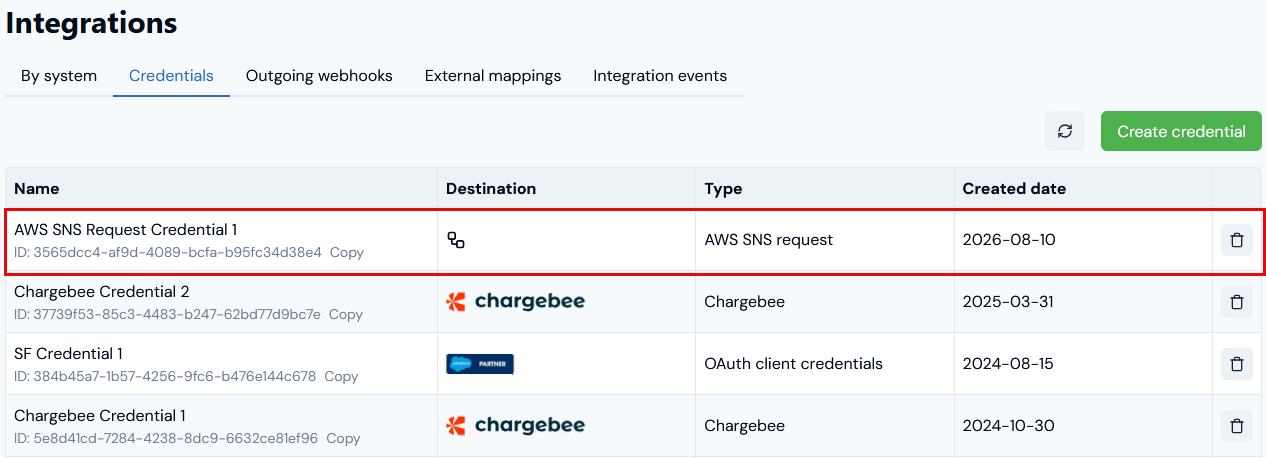 * When we add a trigger to the example Workflow for usage data ingest, this Incoming Webhook Credential will be available for selection, allowing the AWS SNS service to access our Workflow as destination and act as its trigger.
**More details?** See [Creating Incoming Webhook Credentials](https://docs.m3ter.com/guides/integrations/setting-up-integrations/managing-integration-credentials#creating-incoming-webhook-credentials).
#### Creating AWS Service Credential
In the m3ter Console, open the **Settings>Integrations** page and select the **Credentials** tab. From there you can create an AWS Service Credential:
* Enter a **Name** for the Credential and for **Destination**, select **AWS**.
* For **Account id**, enter your AWS account number that hosts the IAM role m3ter will assume when connecting with AWS.
* For **Role name**, enter the IAM role m3ter will assume.
* Select **Create credential**. The new AWS Service Credential is listed on the **Integrations** page under **Credentials**:
* When we add a trigger to the example Workflow for usage data ingest, this Incoming Webhook Credential will be available for selection, allowing the AWS SNS service to access our Workflow as destination and act as its trigger.
**More details?** See [Creating Incoming Webhook Credentials](https://docs.m3ter.com/guides/integrations/setting-up-integrations/managing-integration-credentials#creating-incoming-webhook-credentials).
#### Creating AWS Service Credential
In the m3ter Console, open the **Settings>Integrations** page and select the **Credentials** tab. From there you can create an AWS Service Credential:
* Enter a **Name** for the Credential and for **Destination**, select **AWS**.
* For **Account id**, enter your AWS account number that hosts the IAM role m3ter will assume when connecting with AWS.
* For **Role name**, enter the IAM role m3ter will assume.
* Select **Create credential**. The new AWS Service Credential is listed on the **Integrations** page under **Credentials**:
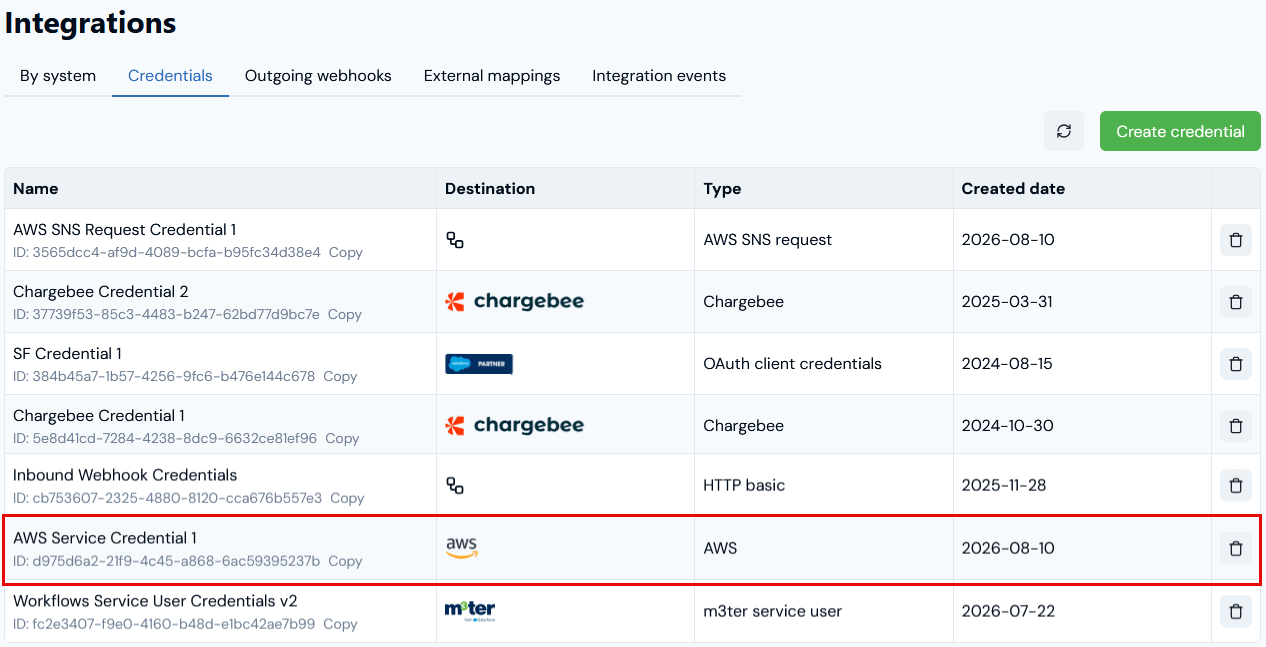 * When we create the example Workflow for usage data ingest, this AWS Service Credential will be available for selection to configure the AWS Read from S3 function used as the second step in the Workflow and allowing it to access the S3 bucket.
**More Details?** See [Creating and Managing Integration Credentials](/guides/integrations/setting-up-integrations/managing-integration-credentials).
### Checking Usage Data Files
The m3ter platform's File Upload service API for usage data measurements accepts JSON formatted files as the default. However, constraints are imposed on file structure and ingest will fail if these constraints are not met. For details, please review the [File Upload Service API](https://docs.m3ter.com/guides/billing-and-usage-data/submitting-usage-data/file-upload-service-api) topic and ensure the usage data measurements files in your AWS S3 buckets for file upload by the Workflow comply with these requirements.
**CSV Usage Data Files**. CSV formatted usage data files are also supported.
## Creating a Workflow from a Managed Template
For the current worked example, from the *Workflows* page we can quickly create a Workflow from a managed template to implement usage data ingest using file upload from an S3 bucket.
**To create a m3sh Workflow from a managed template:**
1. Select **m3sh**:
* When we create the example Workflow for usage data ingest, this AWS Service Credential will be available for selection to configure the AWS Read from S3 function used as the second step in the Workflow and allowing it to access the S3 bucket.
**More Details?** See [Creating and Managing Integration Credentials](/guides/integrations/setting-up-integrations/managing-integration-credentials).
### Checking Usage Data Files
The m3ter platform's File Upload service API for usage data measurements accepts JSON formatted files as the default. However, constraints are imposed on file structure and ingest will fail if these constraints are not met. For details, please review the [File Upload Service API](https://docs.m3ter.com/guides/billing-and-usage-data/submitting-usage-data/file-upload-service-api) topic and ensure the usage data measurements files in your AWS S3 buckets for file upload by the Workflow comply with these requirements.
**CSV Usage Data Files**. CSV formatted usage data files are also supported.
## Creating a Workflow from a Managed Template
For the current worked example, from the *Workflows* page we can quickly create a Workflow from a managed template to implement usage data ingest using file upload from an S3 bucket.
**To create a m3sh Workflow from a managed template:**
1. Select **m3sh**:
 * The **Workflows** page opens.
2. Select **Create workflow>Create managed workflow**:
* The **Workflows** page opens.
2. Select **Create workflow>Create managed workflow**:
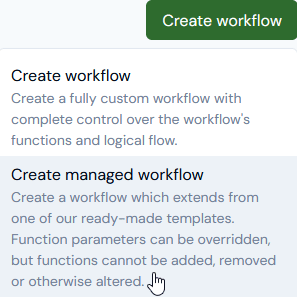 * The **Workflows>Create** from template page opens:
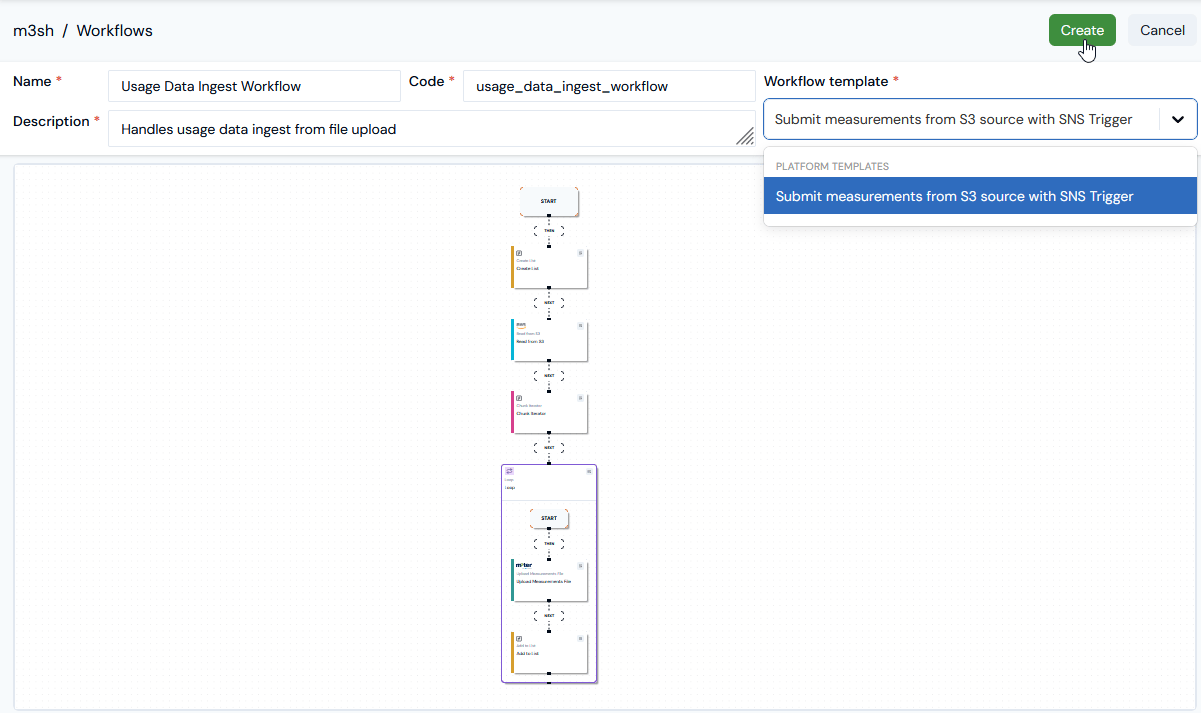 3. Enter the details of the new Workflow:
* **Name**. (*Required*)
* **Code**. (*Required*)
* **Description**. (*Required*)
* **Workflow template**. (Required) Use the drop-down to select the **PLATFORM TEMPLATE** you want to base the new Workflow on: **Submit measurements fro S3 source with SNS trigger**.
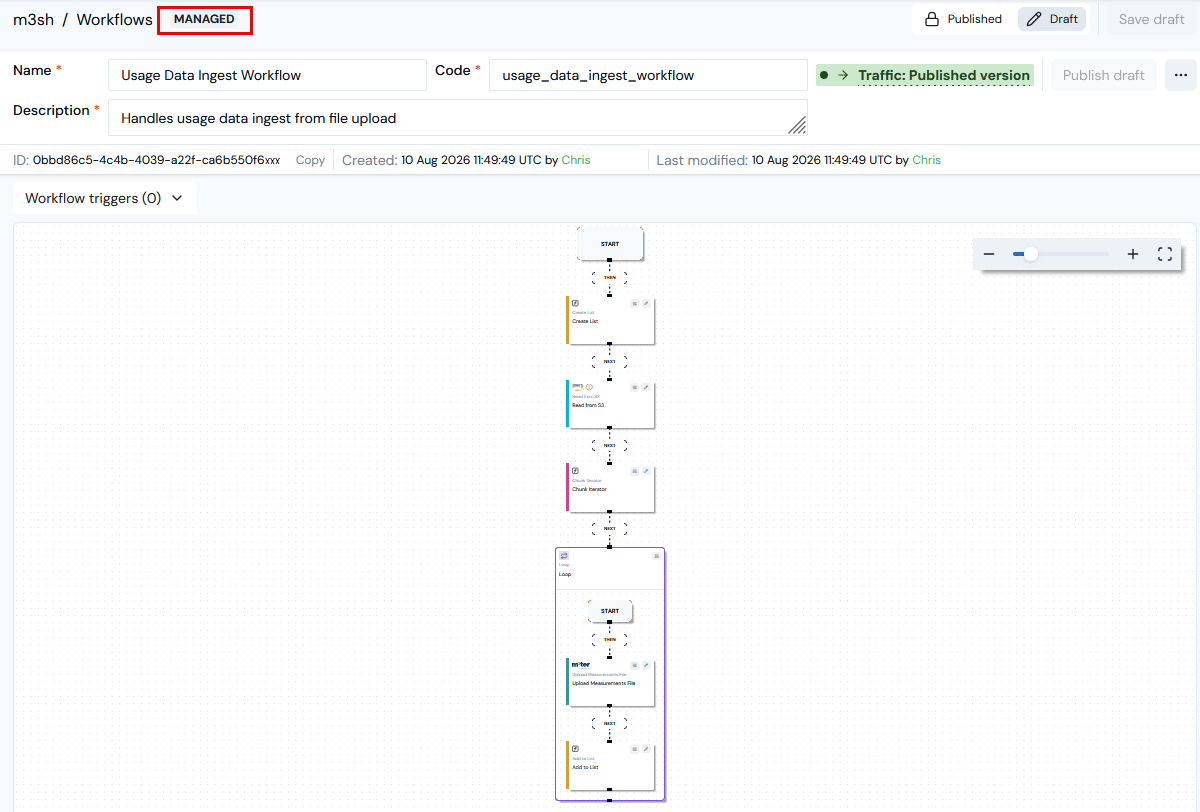
4. Select **Create**. The new Workflow opens in the builder in **Draft** mode and is clearly flagged as **MANAGED**:
3. Enter the details of the new Workflow:
* **Name**. (*Required*)
* **Code**. (*Required*)
* **Description**. (*Required*)
* **Workflow template**. (Required) Use the drop-down to select the **PLATFORM TEMPLATE** you want to base the new Workflow on: **Submit measurements fro S3 source with SNS trigger**.
4. Select **Create**. The new Workflow opens in the builder in **Draft** mode and is clearly flagged as **MANAGED**:
 5. If you zoom in, you will see that the second step uses an **AWS Read from S3** function:
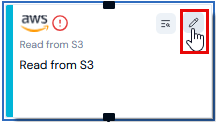 * Note that this function is flagged as invalid because configuration is incomplete.
6. Select to open the function's **Edit** panel:
* Note that this function is flagged as invalid because configuration is incomplete.
6. Select to open the function's **Edit** panel:
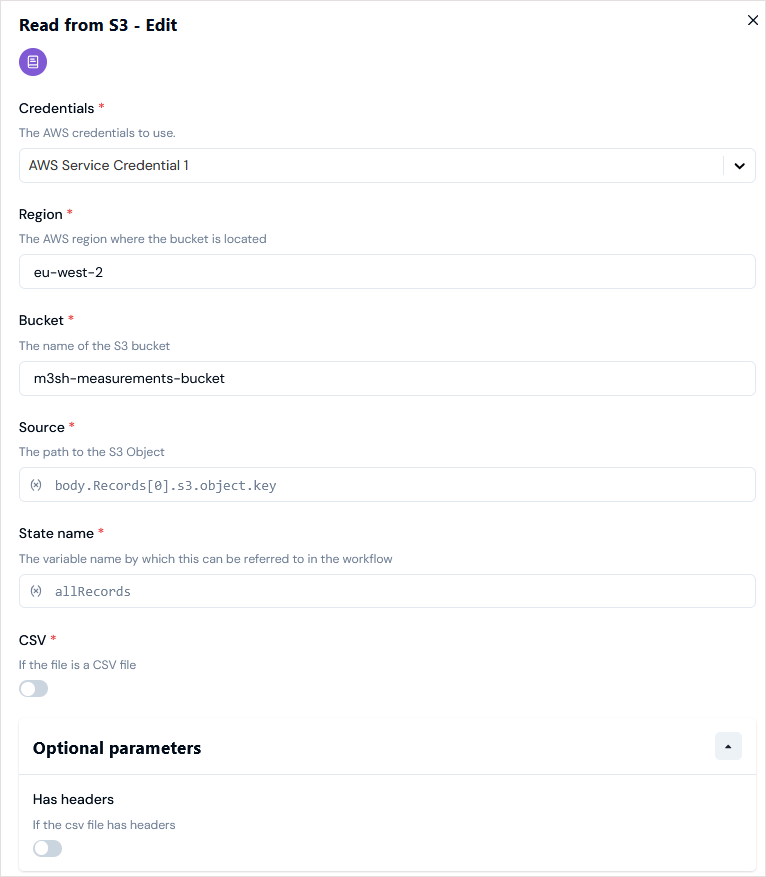
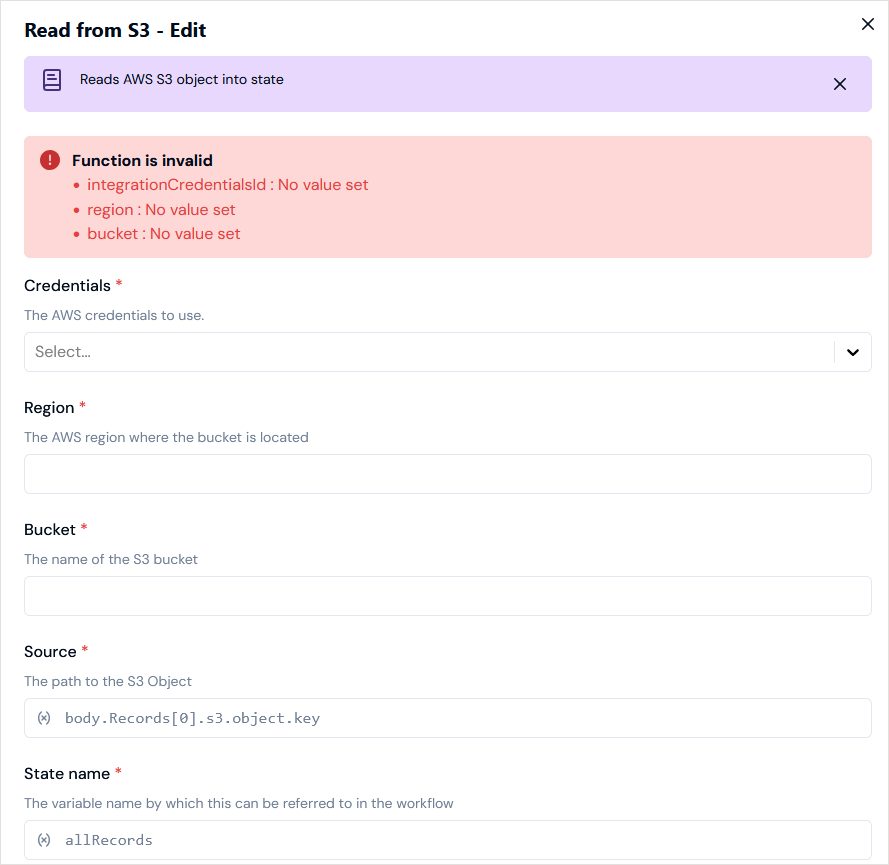 7. Enter the missing required details to complete the **AWS Read from S3** function's configuration:
* **Credentials**. Select the AWS Service Credential created above under [Prerequisites](#prerequisites).
* **Region**.
* **Bucket**.
For example:
7. Enter the missing required details to complete the **AWS Read from S3** function's configuration:
* **Credentials**. Select the AWS Service Credential created above under [Prerequisites](#prerequisites).
* **Region**.
* **Bucket**.
For example:
 * To complete setting up the Workflow, we must now add a webhook trigger to the usage data ingest Workflow - see the [following section](#adding-and-configuring-a-webhook-trigger).
**CSV Usage Data Files**. CSV formatted usage data files are also supported for upload and is an option available when you edit the **Read from S3** function for the Workflow.
## Adding and Configuring a Webhook Trigger
When you add a webhook trigger to a Workflow, you have the option to select users in your Organization that you want to receive an email notification when the trigger is disabled.
**To add and configure a Workflow Webhook trigger:**
1. Select **m3sh**. The **Workflows** page opens.
2. Select the **Name** hotlink text of the Workflow you want to add a trigger to. The **Workflow** opens in **Draft** mode.
3. Select **Workflow triggers**. In the current worked example, no triggers have yet been added for the Workflow:
* To complete setting up the Workflow, we must now add a webhook trigger to the usage data ingest Workflow - see the [following section](#adding-and-configuring-a-webhook-trigger).
**CSV Usage Data Files**. CSV formatted usage data files are also supported for upload and is an option available when you edit the **Read from S3** function for the Workflow.
## Adding and Configuring a Webhook Trigger
When you add a webhook trigger to a Workflow, you have the option to select users in your Organization that you want to receive an email notification when the trigger is disabled.
**To add and configure a Workflow Webhook trigger:**
1. Select **m3sh**. The **Workflows** page opens.
2. Select the **Name** hotlink text of the Workflow you want to add a trigger to. The **Workflow** opens in **Draft** mode.
3. Select **Workflow triggers**. In the current worked example, no triggers have yet been added for the Workflow:
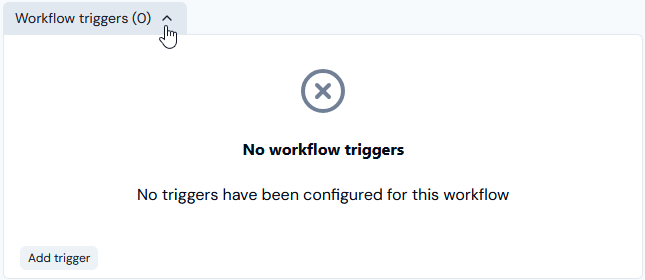 4. Select **Add trigger>Add webhook trigger**:
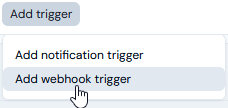 * An **Add webhook trigger** dialog appears:
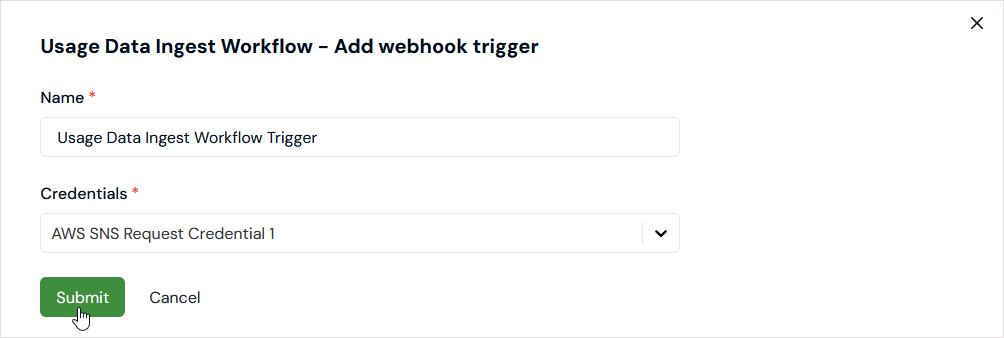 5. Enter a **Name** for the webhook trigger.
6. Use the **Credentials** drop-down to select the Incoming Webhook Credential you want to use to authenticate with the Workflow. For the current worked example, we've selected the Incoming Webhook Credential we set up above - see [Creating Incoming Webhook Credential for AWS SNS Request](#creating-incoming-webhook-credential-for-aws-sns-request).
7. Select **Submit**. The selected webhook trigger is listed under **Workflow triggers**:
* For the selected **INCOMING WEBHOOK**, you can check:
* The URL and copy it to your clipboard.
* Whether the webhook is **ACTIVE** or **INACTIVE**.
8. If you want to set up users in you Organization to receive an email notification if the trigger is disabled, select the **Details** icon:
5. Enter a **Name** for the webhook trigger.
6. Use the **Credentials** drop-down to select the Incoming Webhook Credential you want to use to authenticate with the Workflow. For the current worked example, we've selected the Incoming Webhook Credential we set up above - see [Creating Incoming Webhook Credential for AWS SNS Request](#creating-incoming-webhook-credential-for-aws-sns-request).
7. Select **Submit**. The selected webhook trigger is listed under **Workflow triggers**:
* For the selected **INCOMING WEBHOOK**, you can check:
* The URL and copy it to your clipboard.
* Whether the webhook is **ACTIVE** or **INACTIVE**.
8. If you want to set up users in you Organization to receive an email notification if the trigger is disabled, select the **Details** icon:
 * A **Workflow trigger** modal appears:
9. Under **Trigger options**, use the **Disabled notification users** drop-down to add the Organization users you want to receive an email notification if the Workflow trigger is disabled.
**Disabled Webhook Triggers:** Webhook triggers are automatically disabled if the Workflow encounters errors in 20 consecutive runs via a trigger.
10. Select **Update**. A message shows to confirm that the **Trigger options** for notifying Organization users were updated successfully.
11. Select **Publish draft**. The Workflow is now ready to be triggered and run when you upload usage data files into the designated S3 bucket.
**Important: Testing Usage Data Ingest Workflow!** Before you deploy the Workflow to your production environment, we *strongly recommend* that you run it in your test environment/m3ter sandbox Organization and check all run logs for any errors. You can use Usage [Data Explorer (v2)](/guides/data-explorer/usage-data-explorer-v2) after running the Workflow to check that all usage data measurement from your S3 file have been ingested as expected.
## Branching from a Managed Template
When you create a Workflow, you select a managed template as the starting point to branch your Workflow from. No editing restrictions are imposed and you'll be able to add new functions, remove functions, or modify functions. However, your Workflow will no longer benefit from updates made for future versions of the original platform managed template.
**To create a m3sh Workflow from a managed template:**
1. Select **m3sh**:
* The **Workflows** page opens.
2. Select **Create workflow>Branch from template**:
* A **Workflow trigger** modal appears:
9. Under **Trigger options**, use the **Disabled notification users** drop-down to add the Organization users you want to receive an email notification if the Workflow trigger is disabled.
**Disabled Webhook Triggers:** Webhook triggers are automatically disabled if the Workflow encounters errors in 20 consecutive runs via a trigger.
10. Select **Update**. A message shows to confirm that the **Trigger options** for notifying Organization users were updated successfully.
11. Select **Publish draft**. The Workflow is now ready to be triggered and run when you upload usage data files into the designated S3 bucket.
**Important: Testing Usage Data Ingest Workflow!** Before you deploy the Workflow to your production environment, we *strongly recommend* that you run it in your test environment/m3ter sandbox Organization and check all run logs for any errors. You can use Usage [Data Explorer (v2)](/guides/data-explorer/usage-data-explorer-v2) after running the Workflow to check that all usage data measurement from your S3 file have been ingested as expected.
## Branching from a Managed Template
When you create a Workflow, you select a managed template as the starting point to branch your Workflow from. No editing restrictions are imposed and you'll be able to add new functions, remove functions, or modify functions. However, your Workflow will no longer benefit from updates made for future versions of the original platform managed template.
**To create a m3sh Workflow from a managed template:**
1. Select **m3sh**:
* The **Workflows** page opens.
2. Select **Create workflow>Branch from template**:
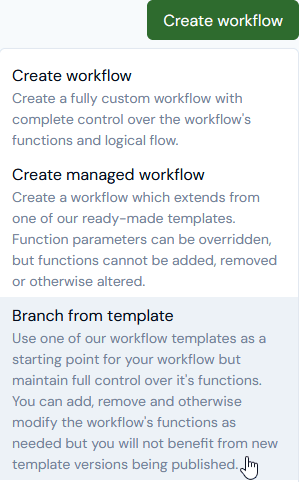 * A **Branch from template** modal opens:
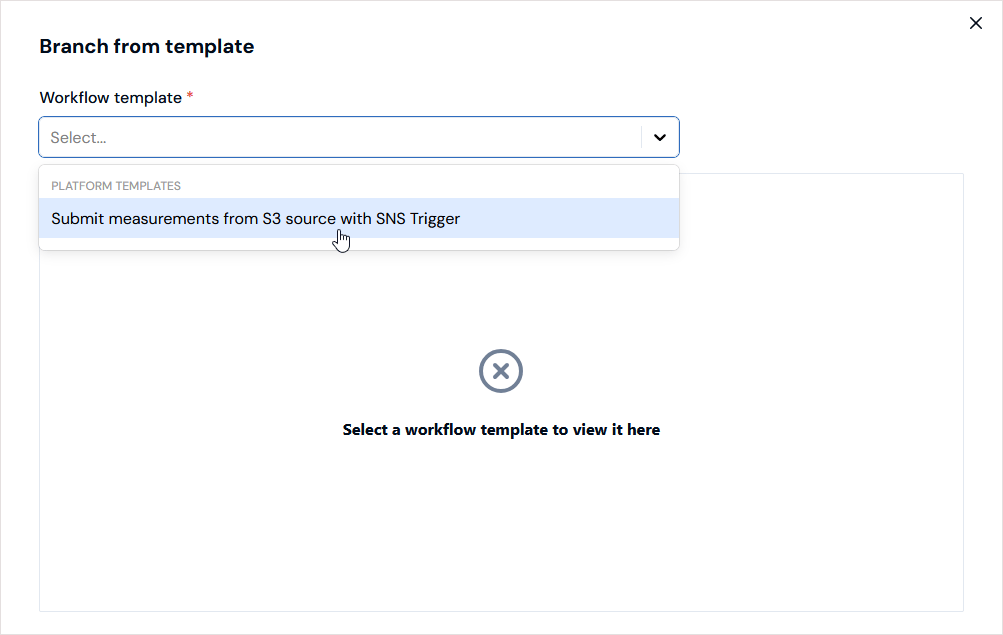 3. Under **PLATFORM TEMPLATES**, select the **Workflow template** you want to branch your new Workflow from. The selected template is loaded into the modal to preview it:
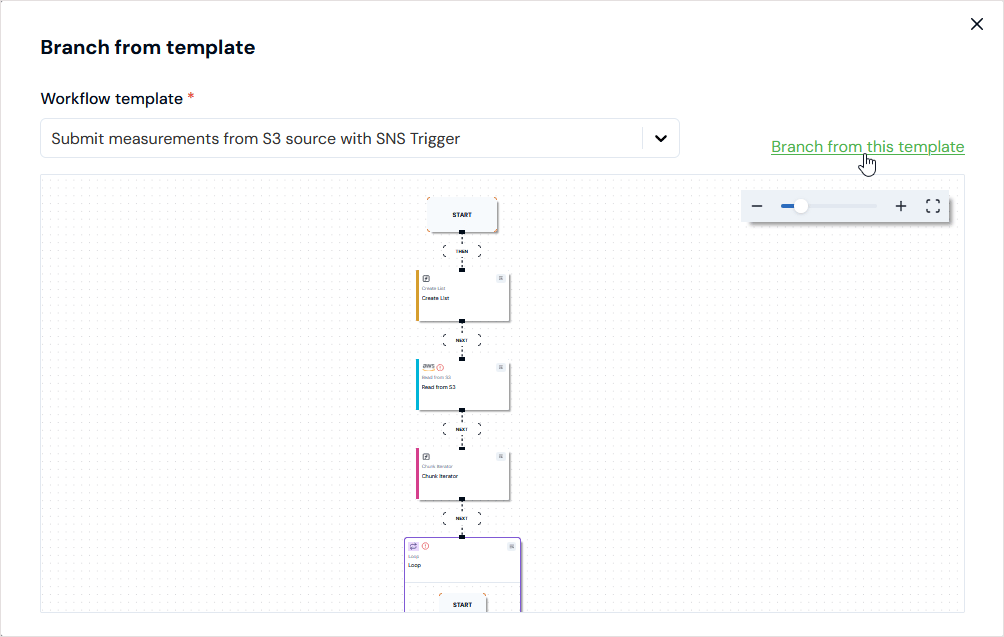 * You can zoom in and inspect function details to assess the suitability of the template as a starting point for your new Workflow:
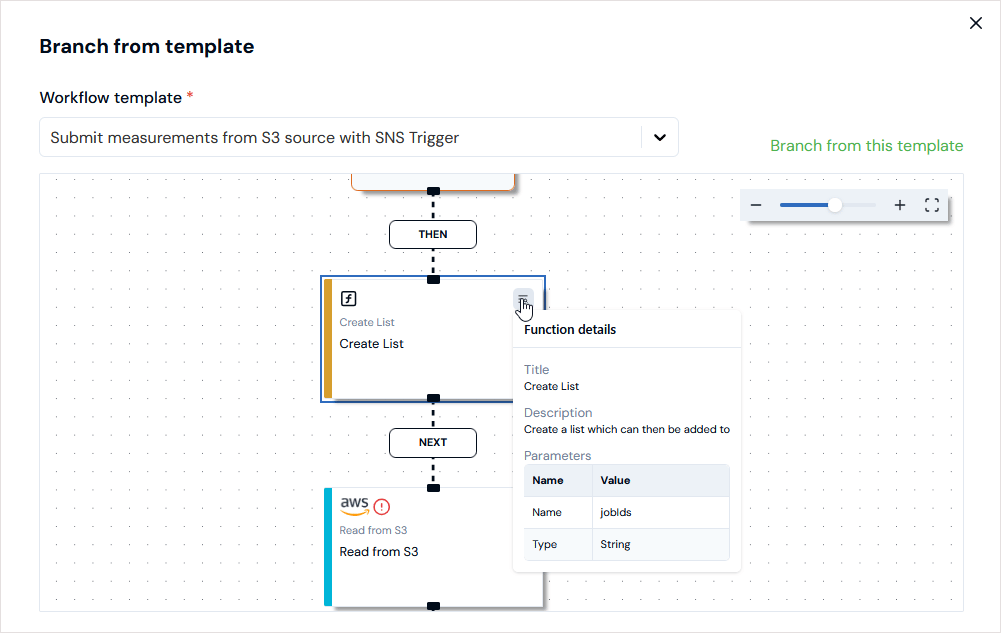 4. Select the **Branch from this template** hotlink. The **Workflows>Create** page open allowing you to enter required details for the new Workflow:
* **Name**.
* **Code**.
* **Description**.
5. Select **Create**. The Workflow opens in the Builder in **Draft** mode:
4. Select the **Branch from this template** hotlink. The **Workflows>Create** page open allowing you to enter required details for the new Workflow:
* **Name**.
* **Code**.
* **Description**.
5. Select **Create**. The Workflow opens in the Builder in **Draft** mode:
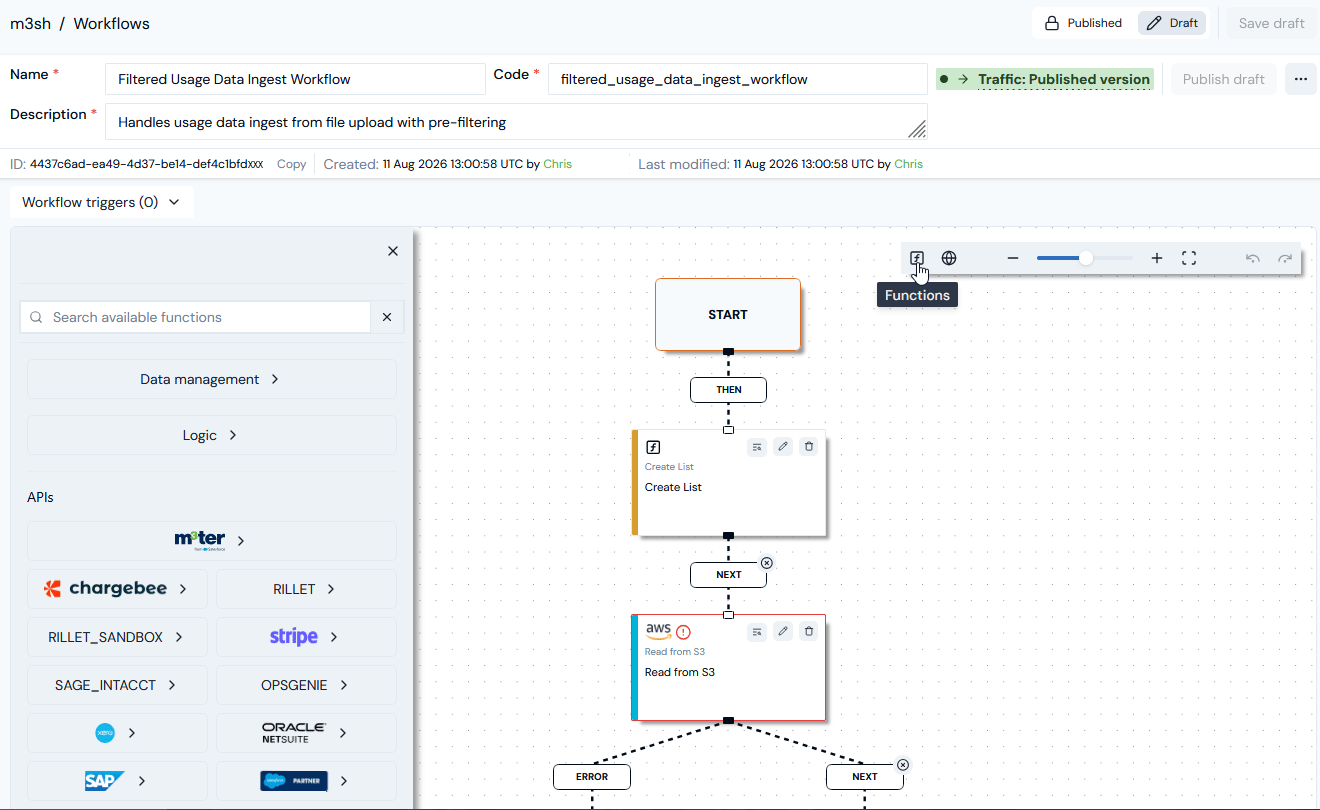 Note that:
* You can select to open the **Functions** menu or add **Global parameters**.
* The Workflow is *not flagged* as **MANAGED**.
Note that:
* You can select to open the **Functions** menu or add **Global parameters**.
* The Workflow is *not flagged* as **MANAGED**.