- In Sales view, select the Opportunities tab.
- Open the Opportunity you’ve added a Product to and configured a m3ter mappings for.
- Select the Send to M3ter button at top-right:

- A modal opens for the Account Data Mapping tab, which previews the mappings of the Salesforce Account object field values into corresponding m3ter Account object fields:
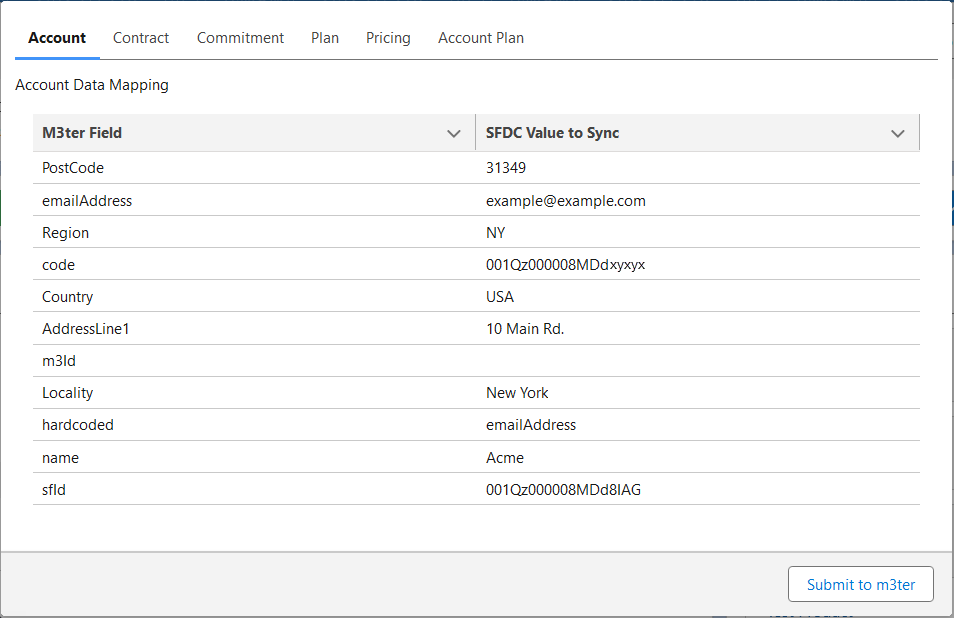
- Note that if you want to change any to the field values that will be synced into m3ter, you can cancel out of the sync action at this point, make any required editing changes, and then restart and complete the Send to M3ter sync action.
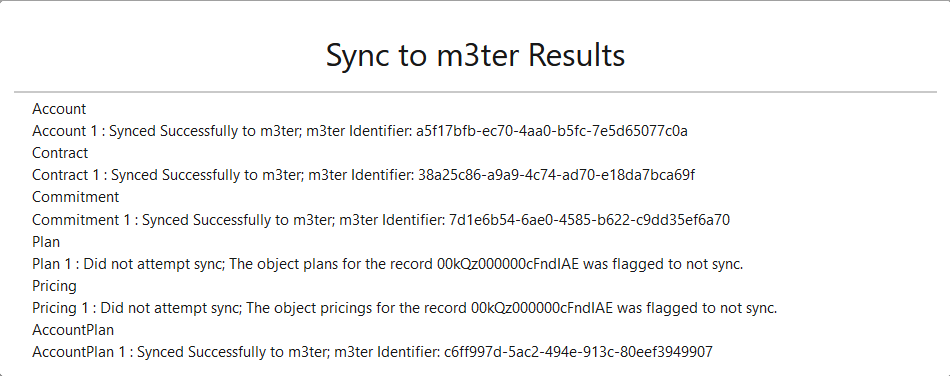
- Select Submit to m3ter. When the sync process completes, a Sync to m3ter Results screen shows:
- You can now go to your m3ter Organization and check that the sync action has created or updated the respective data objects and mapped in the correct fields values for those objects:
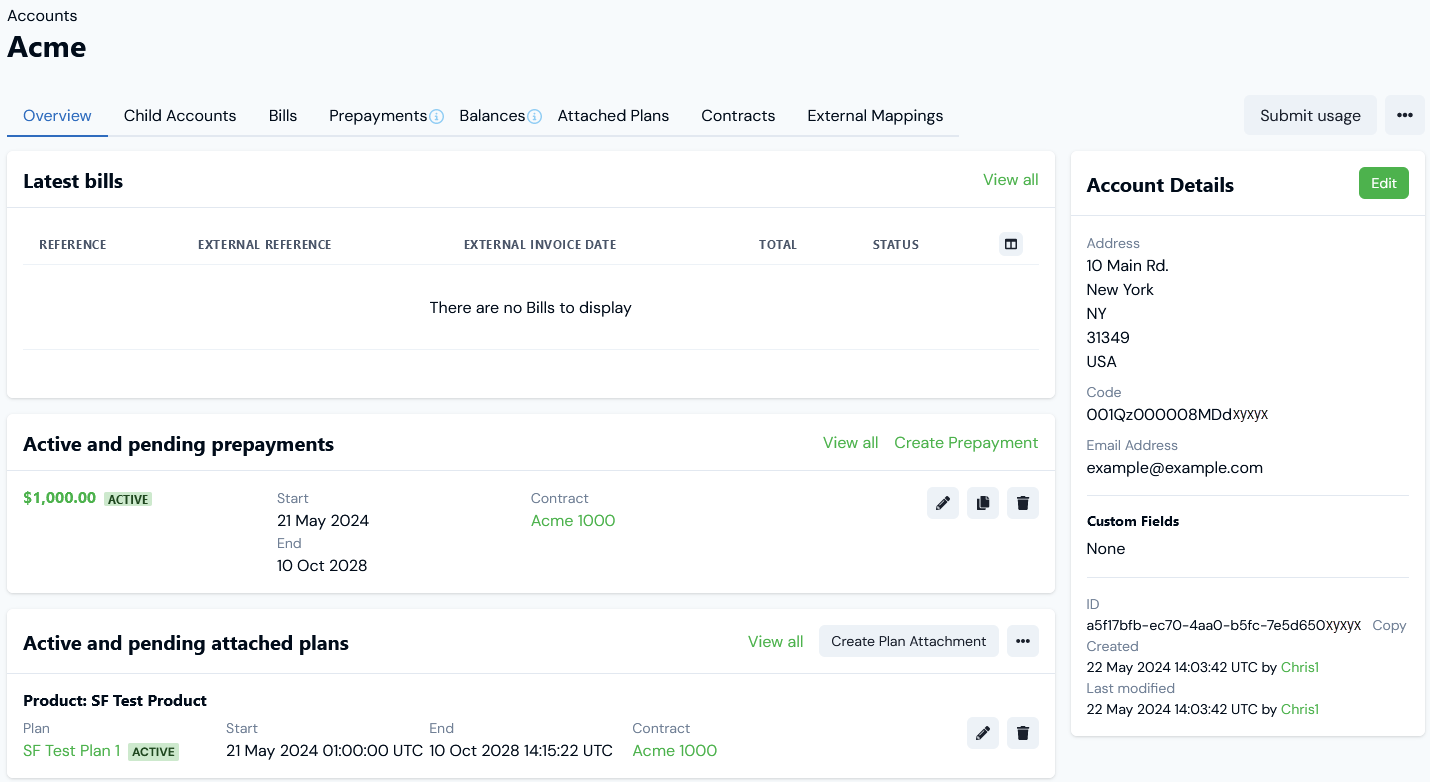
- In this example, the Acme Account has been successfully added to the m3ter Organization and the Account Details card shows that the fields values have been correctly synced in from Salesforce.
- Note also that the m3ter object creation is attributed to the m3ter Service User whose credentials you added for the Salesforce m3ter App.