- First, complete prerequisites.
- Second, create the integration.
- Third, set up authentication for the integration to connect with AWS Marketplace using an integration credential.
Completing Prerequisites
This section provides guidance on completing some necessary prerequisites for your m3ter integration to successfully send out Bills to AWS Marketplace:AWS Marketplace Dimension Pricing
As a prerequisite, you must ensure that any target pricing dimensions in your AWS Marketplace listing are configured with a price of $0.01 per unit. Usage data for these dimensions is then submitted via the m3ter platform. This allows m3ter to fully control pricing logic and to ensure usage metering accuracy. m3ter then proceeds to calculate the quantity to report to AWS Marketplace based on the line items in the bill, and after pricing model logic has already been applied to metered usage. For example, for a line item total of $0.50 dollars m3ter will report a quantity of 50 to AWS Marketplace.Completing AWS Prerequisites
The native m3ter AWS Marketplace integration makes use of a combination of the product code and pricing dimension key to identify the correct dimensions in your AWS Marketplace account that billing data will be sent to. You’ll need this product code/dimension key to hand when creating your AWS integration. To check the product code/dimension key in AWS Marketplace:- In your AWS Marketplace account, go to Home>SaaS Products:

- Open the Marketplace product you’ll use for your m3ter integration - in this example M3ter SaaS Alpha Test:

- Under Product summary read-off the Product code and under Pricing configuration the Pricing dimension you want to use for your m3ter AWS Marketplace integration:
-
In this example, the required format for the product code/dimension key will be:
- 78qogxeqwt7zyevfefsw6q48i-measurements
Completing External Mappings
There are External Mapping you must configure in m3ter to support your AWS Marketplace integration.Account Mappings
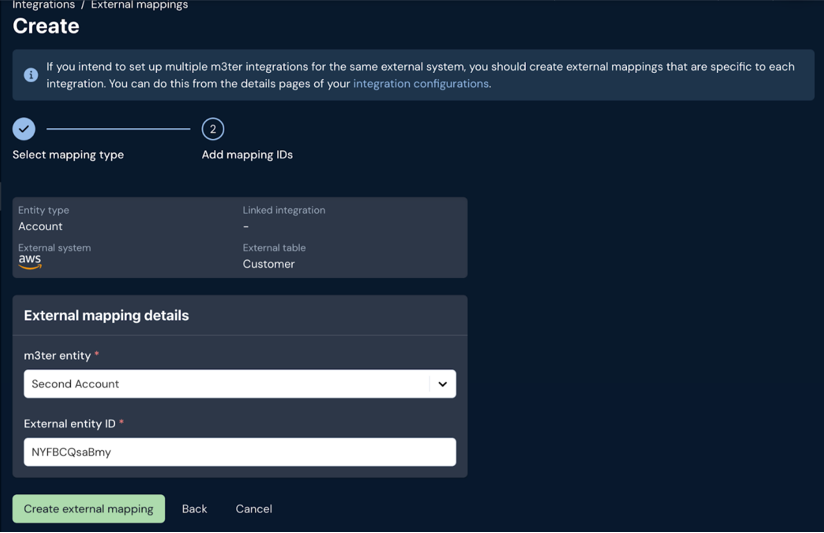
Whenever an end customer subscribes to a Marketplace product, AWS provides a customer identifier which m3ter needs to know in order to meter against it. So, an External Mapping needs to be set for an m3ter Account to the AWS Customer:- First, Select mapping type:

- Second, Add mapping IDs:
Usage Line Item Mappings
Depending on how you want to split Bill usage line items for your integration, you might also need to set up some additional External Mappings.Item Per Product
With this option selected, you’ll need to set up external mappings for each product. m3ter will then send the total of all line items for a given product over to its mapped AWS Marketplace dimension:
Item Per Aggregation
With this option selected, it’s necessary to set up external mappings for each aggregation. m3ter will then send the total of all line items for a given aggregation over to its mapped AWS Marketplace dimension: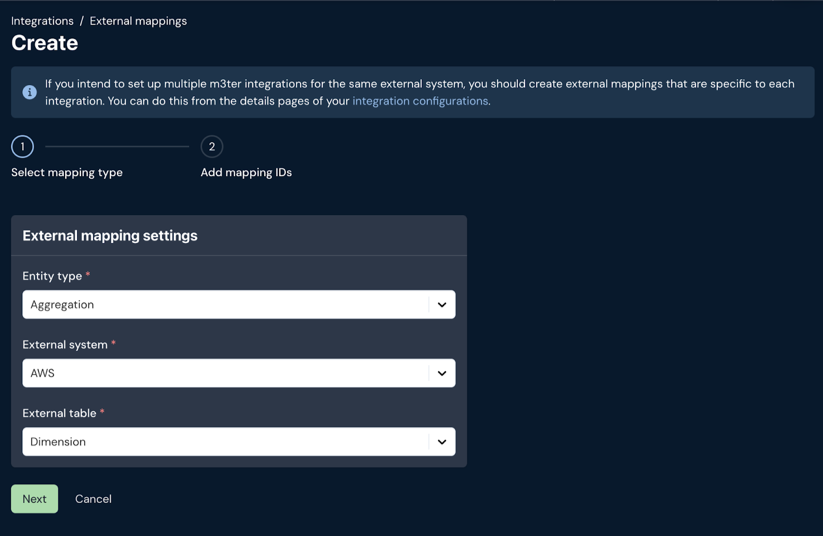
Creating the Integration
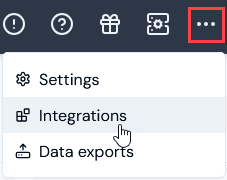
You can quickly set up a native AWS Marketplace integration in the Console. To define a m3ter - AWS Marketplace integration:- Select Integrations:
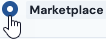
- Select Marketplace:
- Select AWS:
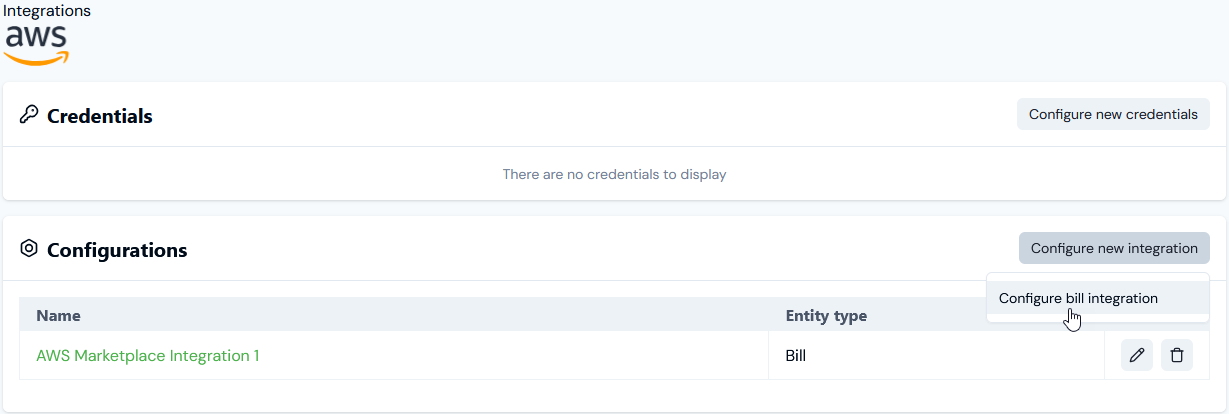
- On the Configurations panel, select Configure new integration>Configure bill integration:
- Use the Global configuration panel to:
- Enter a Name for the Integration. This is required and is useful if you intend to create multiple Integrations for the same External system/Entity Type and need to clearly differentiate them.
-
Select the Accounts you want the integration to apply to:
- Account ids. Select the Accounts you want to include - all selected Accounts are treated as allowed for the integration.
- Restricted account ids. Select the Accounts you want to exclude - all selected Accounts are treated as disallowed for the integration.
-
Select Users for Email notifications if disabled:
- Integration disabled notification users. Select Organization Users you want to receive an Email notification if the integration is automatically disabled.
- Use the Entity configuration panel to configure the m3ter entity you will be synchronizing with for the integration. In the case of a Bill integration, this entity will be the Bill generated for a customer Account in m3ter:
-
Only send bill on approval. Enable this if you only want Bills to be sent when they have been approved. If disabled, the Bill will be sent every time it is regenerated. Default is disabled. Note that:
- The frequency of Bills sent will depend on the billing frequency defined for the Account Plan attached to the Account - such as daily/weekly/monthly/annually.
- If an Account has a Prepayment on it and the billing for Prepayment fees is configured to run on a customized schedule, Bills will be sent when scheduled Bills are generated.
- If a Bill is manually recalculated the updated Bill will be sent.
- If you enable this, then the integration will not run for all Bill Jobs.
- Use external mapping account code. Enable this if you want the integration to look in the External Mappings for the Account identifier code, which means you can use an external Id. If this is disabled, the m3ter Account Id is used. Default is disabled.
-
Excluded line item types. Optionally filter the Bill line item types you send to the destination system. For example, only send charges or credits and exclude all other line item types.
- For details of line item types, see Bill Line Item Types.
-
Account filter. Optionally, enter an expression that is run on the Account to determine whether or not the integration is run. You can use this setting if you have multiple destinations for sending Bills outbound to AWS Marketplace. For example:
customFields != null AND customFields.country = = UK- In this example, the integration will run for an Account only if you have created a Custom Field for the Account called country and given the field a value of UK.
-
Enforce external mappings for config. Optionally enable this if you want the integration to use only those external mappings specified as being for this configuration.
- Use this setting if you want to set up multiple integrations for the same external system. You can then create separate external mappings for each integration from the details page of each integration, and these external mappings become Linked external mappings for the specific integration. See Creating Linked External Mappings.
- Excluded products. Optionally filter the Bill line items you send to the external system. Any line items associated with the selected Products will be be excluded when the integration runs.
- Excluded aggregations. Optionally filter the Bill line items you send to the external system. Any line items associated with the selected Aggregations will be be excluded when the integration runs.
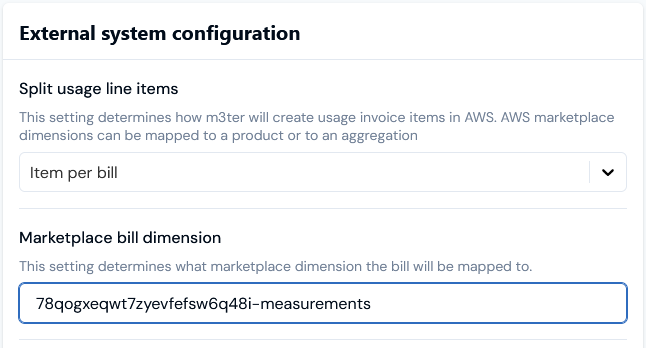
- Use the External system configuration panel to enter the settings specific to the external system. These settings include field mappings as well as other system-specific configurations:
-
Split usage line items. Select how you want m3ter to create usage invoice items in AWS Marketplace. Three options:
- Item per bill.
- Item per product.
- Item per aggregation.
- Marketplace bill dimension. Determines what AWS Marketplace dimension the bill will be mapped to:
-
Aws marketplace cloudtrail checks. Enable this switch if you want to run additional checks using the AWS CloudTrail event store:
- Aws marketplace cloudtrail store id. AWS CloudTrail event store id - used to run additional checks on usage submitted to AWS Marketplace.
- Aws marketplace cloudtrail region. AWS CloudTrail event store region - used to run additional checks on usage submitted to AWS Marketplace.
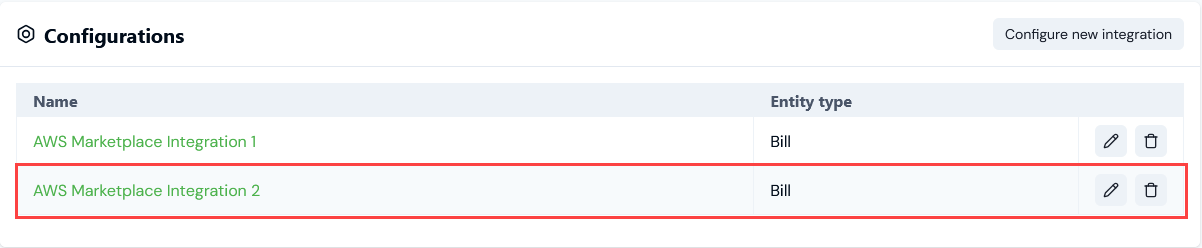
- Select** Create integration**. You are returned to the Integrations>AWS page, where the integration is listed on the Configurations panel:
Setting Up Authentication for the Integration
When you have created an AWS Marketplace integration, you can select an integration Credential you’ve created for authentication allowing the integration to connect with AWS Marketplace. See Creating AWS Marketplace Integration Credentials. To set up authentication for your m3ter - AWS Marketplace integration:- Select Integrations. The** Integrations** page opens.
- Select Marketplace.
- Select AWS. The Integrations>AWS page opens.
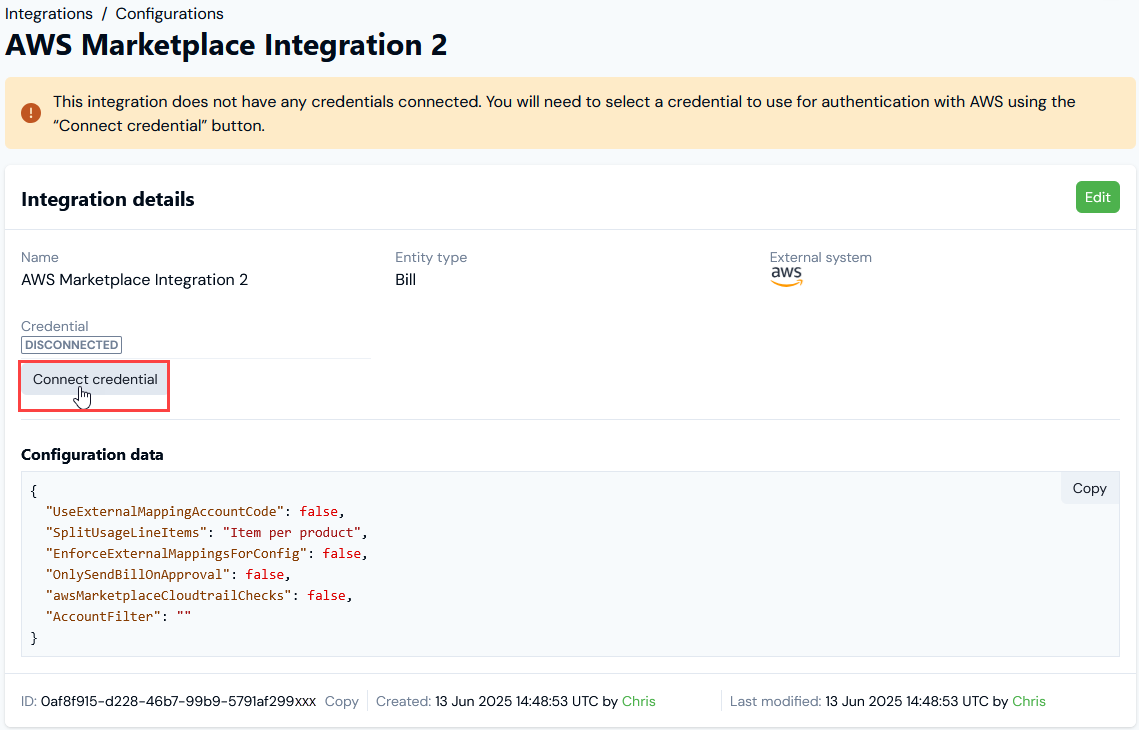
- On the Configurations panel, select the Name hotlink text of the AWS Marketplace integration you want to set up authentication for. The Integration details page opens:
-
Notes:
- A warning is shown that the integration is not yet connected to AWS Marketplace.
- The ID of the integration configuration is shown at the bottom of the Integration details card, and you can copy the ID directly to your clipboard.
- Select Connect credential. A Select credential modal appears.
- Select a Credential you created earlier and want to use to authenticate the integration with AWS Marketplace. See Creating AWS Marketplace Integration Credentials.
- Select Confirm. The modal closes and on Integrations details, the integration now shows as CONNECTED:
- The Credential used to connect the integration is shown.
- If at any time you want to disconnect the integration, select Disconnect credential.
- If you want to use a different Credential for connecting the integration, select Change credential. The Select credential modal appears and you can select a different Credential.