- Outbound from m3ter Organization into external systems.
- Inbound from external systems into your m3ter Organization.
- Worked Example
- m3sh Workflow Solution - Design and Prerequisites
- Building a Workflow
- Adding and Configuring a Workflow Webhook Trigger
- Testing the Workflow
Worked Example
Suppose you use an external CRM system to create and maintain your customer account records. You want to automate the syncing of this data with the customer Accounts data held in your m3ter Organization and to ensure that any customer account creation, update, or delete event in the external CRM causes a corresponding change in the m3ter data.m3sh Workflow Solution - Design and Prerequisites
A m3sh Incoming Webhook Workflow can provide a solution to meet this example use case. Some preparatory work is required:- Setting Up External System Webhook
- Creating Incoming Webhook Credential
- Designing the Workflow
- Workflow Design - Setting Up Function Prerequisites
Setting Up External System Webhook
In your external system, you must first set up a Webhook destination that you’ll use to send any data payloads to for syncing with your m3ter data. See Incoming Webhook Workflows for more details. For the current worked example where Chargebee is the external system, the Chargebee setup will have the system sendevent_type payloads when customer records are updated.
Creating Incoming Webhook Credential
In the m3ter Console, open the Integrations>Credentials page and create an Incoming Webhook Credential:- Enter a Name for the Credential and for Destination, select m3sh Workflow.
- For the current example, we’ll leave the Type as default HTTP basic and since the Webhook was set up from Chargebee as the source system, enter the matching Username and Password. See Creating Incoming Webhook Credentials for more details.
- The new Incoming Webhook Credential is listed on the Credentials page:
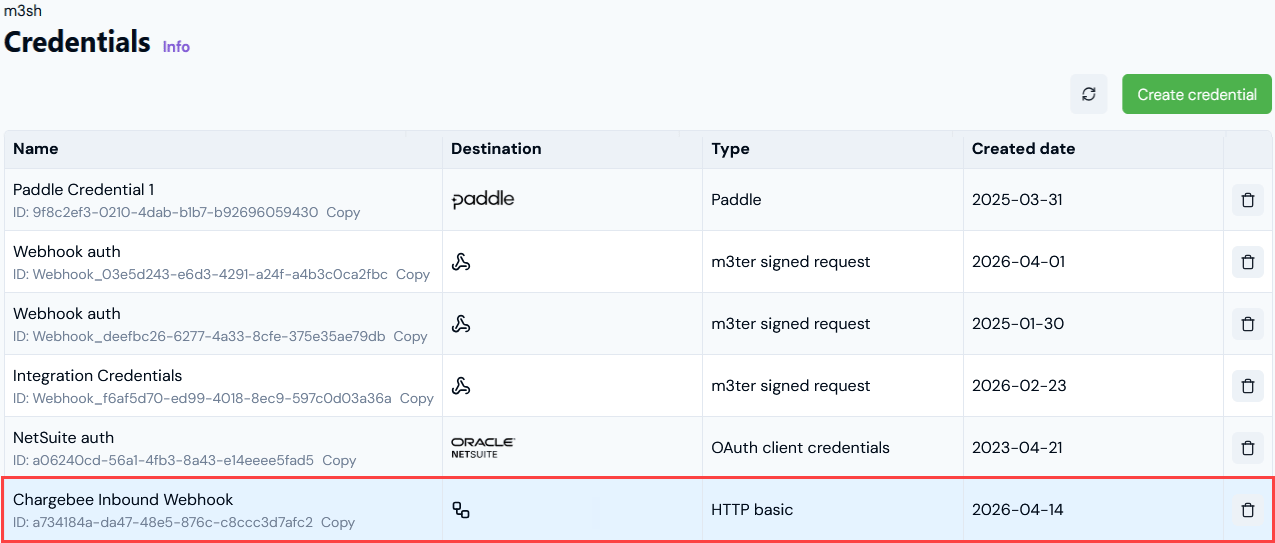
- When we add a trigger to the Incoming Webhook Workflow, this Incoming Webhook Credential will be available for selection, allowing the Chargebee system to access our Workflow as destination and act as its trigger.
Designing the Workflow
Our Workflow design solution must ensure that when a change is made to a customer record in the external CRM system, a corresponding change is made automatically to the customer Account entity in our m3ter Organization. The design solution has to accommodate different cases of a change in a customer record:- CASE 1 Customer Created
- CASE 2 Customer Changed
- CASE 2a Customer Updated
- CASE 2b Customer Deleted
- Give it a descriptive title: Is customer created event?
- Add the following Calculation as the condition to evaluate as TRUE or FALSE:
body.event_type == "customer_created"
- The If function will then branch the Workflow.
CASE 1: Customer Created
If Step 1 evaluates to TRUE and a new customer record has been created in the external system, create the following branch for the Workflow. Sub-Step 1 For this first Sub-Step 1, we’ll add an Apply Transformation Data Management function:- Give it a descriptive title: Build new Account data.
- Configure it to apply a Transformation we’ve created to control how fields in the external system customer record are mapped to fields in the m3ter Account entity.
- Store the new object created by the Transformation into the Workflow state in the newAccount variable.
- Use the newAccount state variable to make the create request.
- Store the response in the newAccountResponse state variable.
- The reason for this last step is to allow for cases where the customer record change is either a customer updated or customer deleted event type. Since the payload from the Chargebee system will not contain a m3ter Account ID, we create an External Mapping, which we can then use to obtain the corresponding m3ter Account ID using the external Chargebee system payload.
CASE 2: Customer Changed
If Step 1 evaluates to FALSE and a customer record has been changed in the external system, we’ll first add a Lookup m3ter entity UUID m3ter API function:- Give it a descriptive title: Does account exist?
- Use this to lookup confirm that an External Mapping exists for the external system, table, and ID and as created by Sub-Step 3 in the main TRUE branch.
- Store the m3ter Account entity UUID from that External Mapping in the existingAccountId Workflow state variable.
- Give it a descriptive title: Is customer changed event?
- Add the following Calculation as the condition to evaluate as TRUE or FALSE:
body.event_type == "customer_changed"
- The If function will then branch the Workflow.
- Give it a descriptive title: Load existing account
- Enter a m3ter Service User Credentials to authenticate this call.
- Use this to load the existing Account using the value of the existingAccountId in the state.
- Store the response in the existingAccount state variable.
- Give it a descriptive title: Create Account updates data
- Reference a transformation created to map Chargebee field custom record values to m3ter customer Account entity fields. This will ensure any fields updated in the Chargebee payload for the change event are now mapped to the m3ter entity data fields.
- Store the transformed object in the Workflow state using the accountUpdates variable.
- Give it a descriptive title: Apply Account updates to existing Account data
- Use this function to set multiple fields in the existingAccount state variable using those held in the accountUpdates variable.
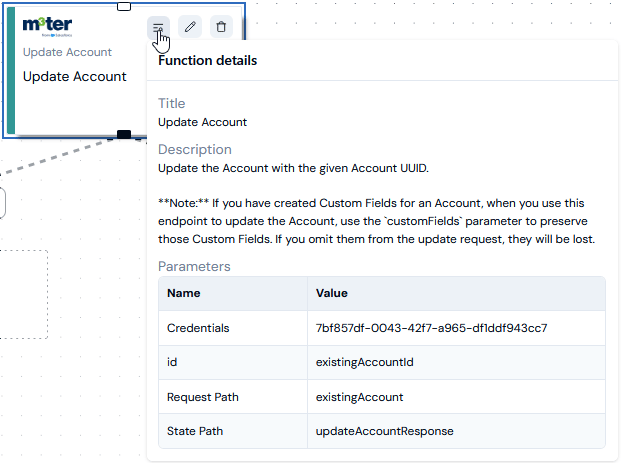
- Give it a descriptive title: Update Account
- Use this function to use the existingAccount state variable for the request and update the m3ter customer Account entity. This will ensure that the Account entity fields values now match the updated Chargebee customer record values.
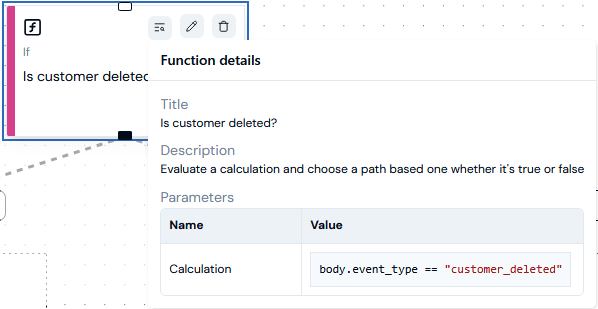
- Give it a descriptive title: Is customer deleted event?
- Add the following Calculation as the condition to evaluate as TRUE or FALSE:
body.event_type == "customer_deleted"
- The If function will then branch the Workflow.
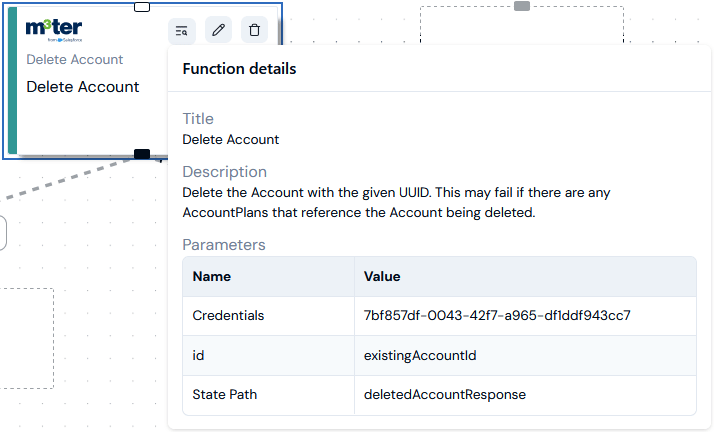
- Give it a descriptive title: Delete Account
- Use the existingAccountId state variable for the request.
- Store the response in the deletedAccountResponse variable.
Workflow Design - Setting Up Function Prerequisites
The Workflow design requires us to use all three types of Workflow function, and for some of these we’ll need prerequisites in place to complete a valid functions configuration:- Logic functions. No prerequisites required.
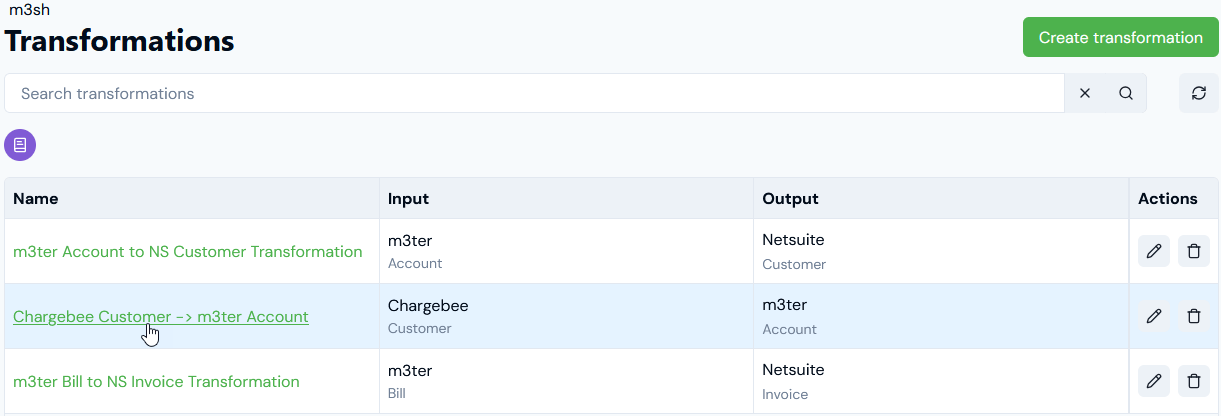
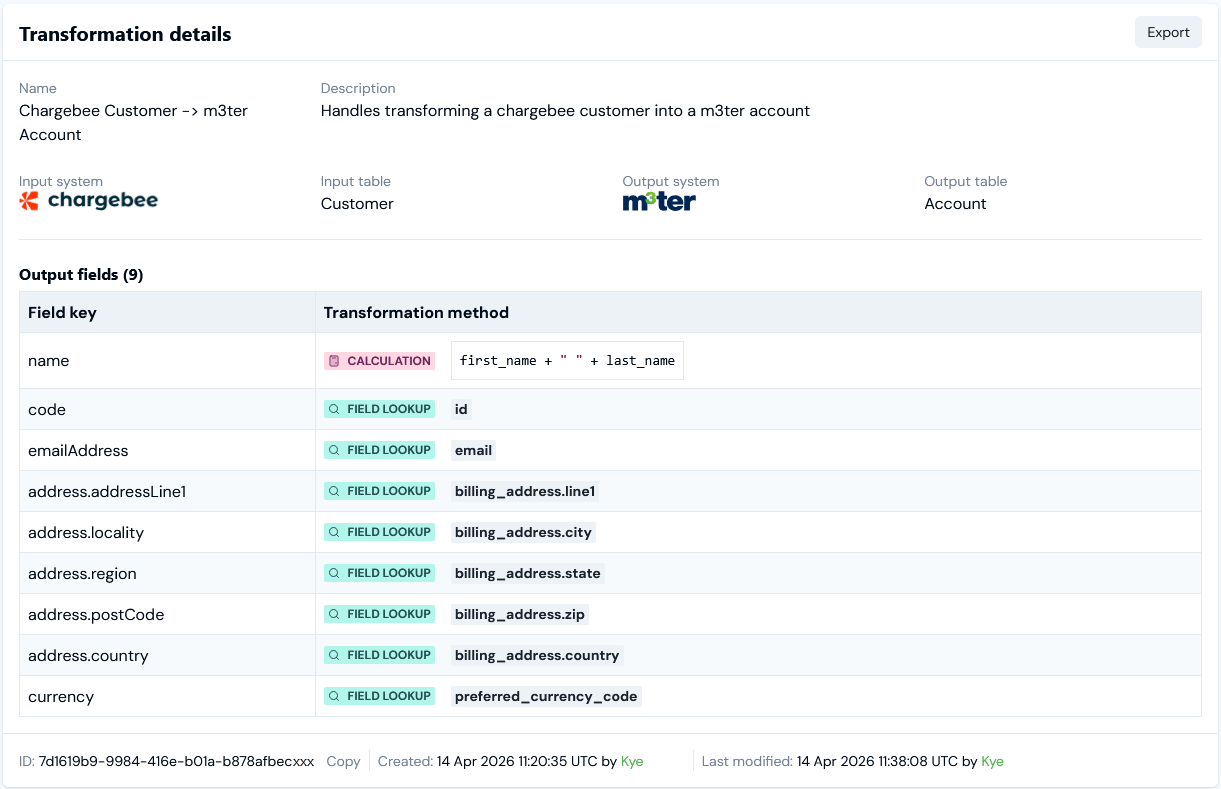
- Data management functions. The Workflow design requires an Apply Transformation Data Management function and we can set up the Chargebee Customer → m3ter Account Transformation as a prerequisite:
- API functions. API functions in a m3sh Workflow that call the m3ter system can use Credentials set up for m3ter Service Users. We’ll need to create a m3ter Service User and a Credential for that user in our Organization. See Service Authentication.
Building a Workflow
We’ll now open the Workflow Builder and create a Workflow to comply with the design solution set out in the Designing the Workflow section above. To create and build a m3sh Workflow:- Select m3sh:

- The Workflows page opens.
- Select Create workflow:
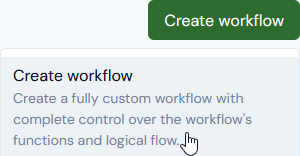
- The Workflows>Create page open allowing you to enter required details for the new Workflow:
- Name.
- Code.
- Description.
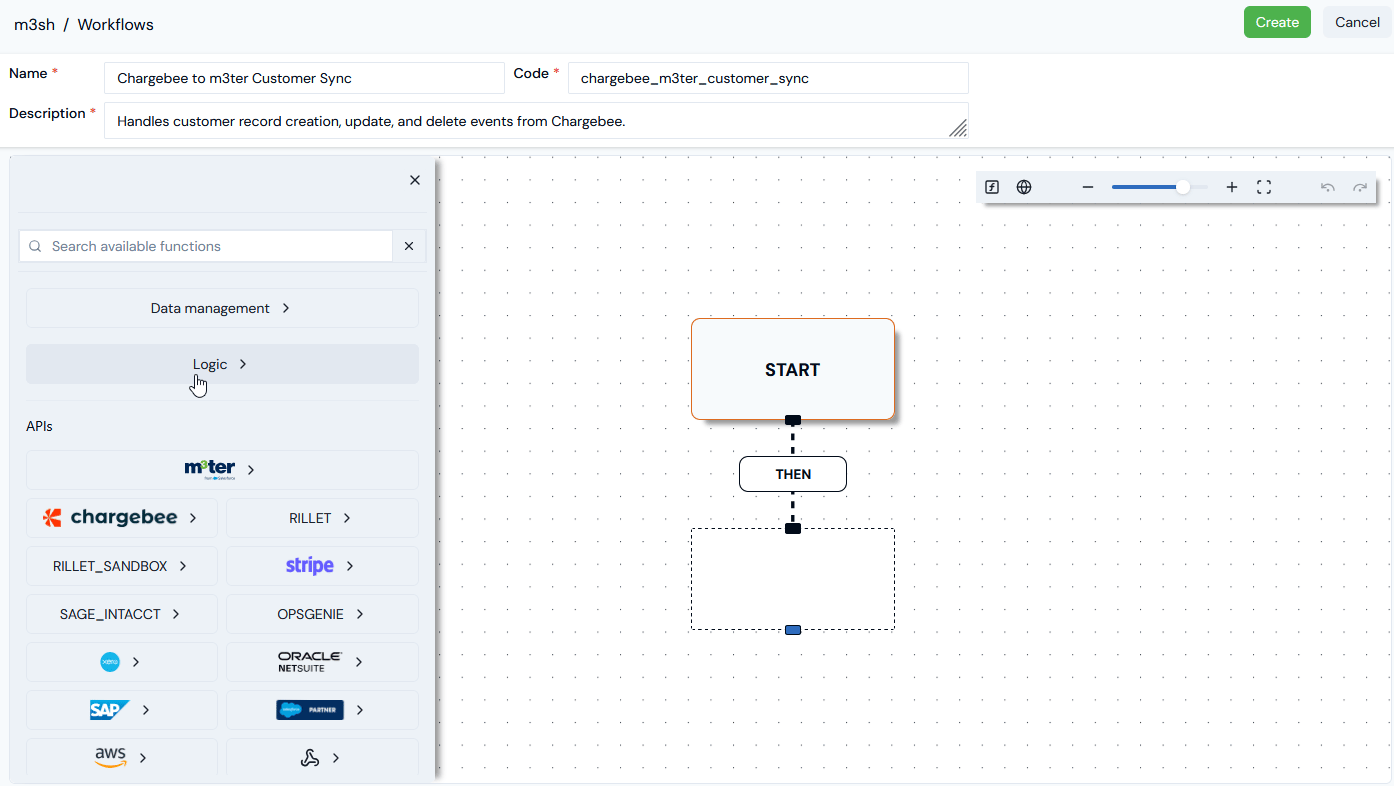
- The builder canvas shows a starter Workflow. You can use pan and zoom controls or fit-to-view for the canvas area as you add and configure functions.
- The Add function menu panel is shown and you can collapse the panel at any time to open up more canvas area.
- If you try to save the Workflow without having added at least one function, then you’ll receive an error.
- You can add a trigger in the Workflow builder later - see the following Adding and Configuring a Workflow Webhook Trigger section.
- On the Add function menu, select Logic.
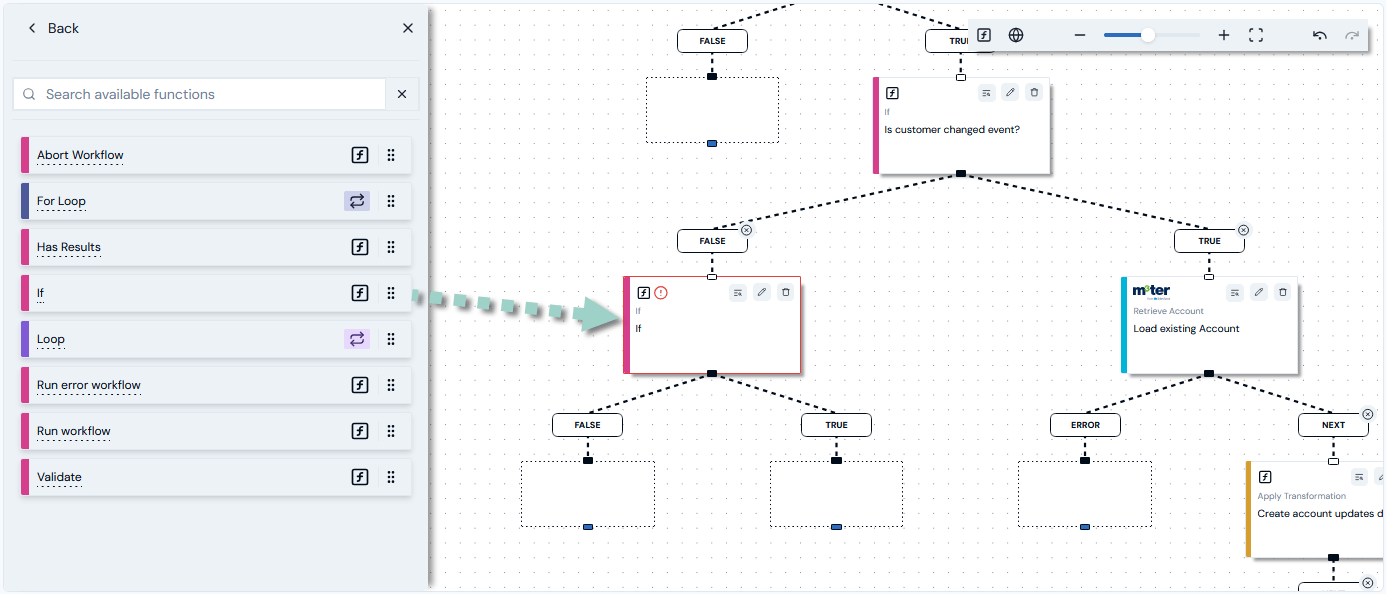
- Drag-and-drop the If function onto the Workflow to create the first step:
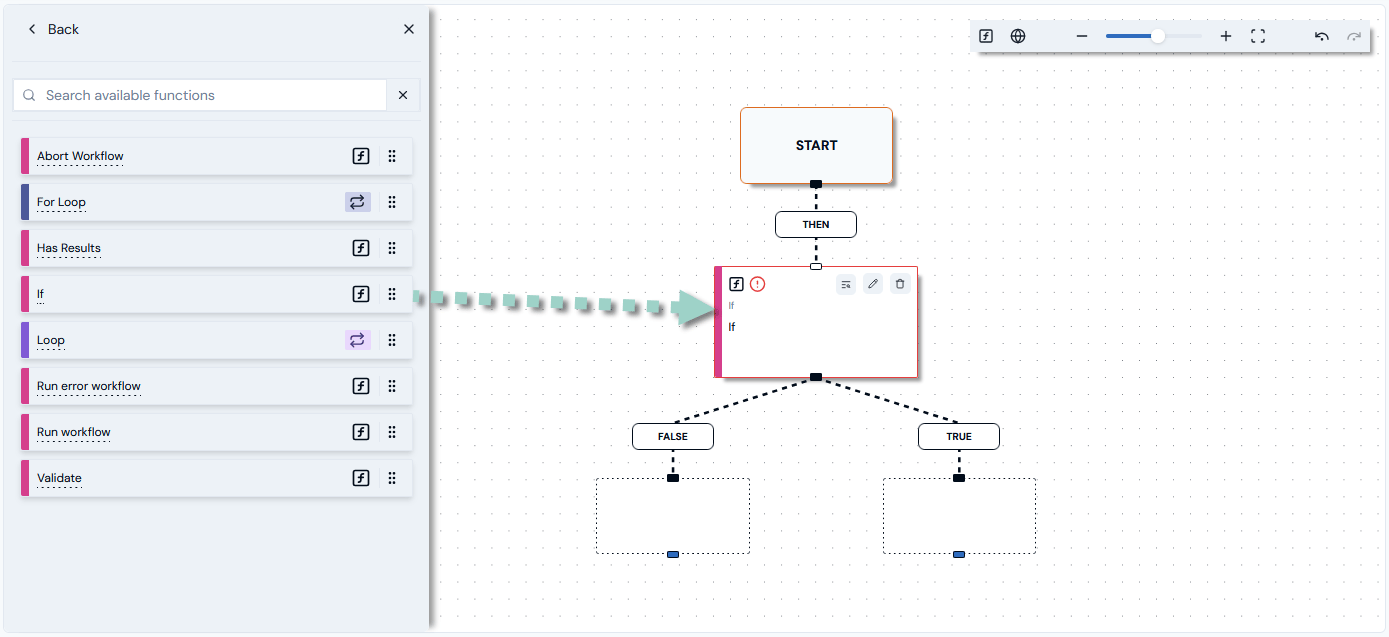
- Note that the function shows an alert and has a red border when first added to the Workflow since not yet configured.
- On the If function, select the Edit icon:
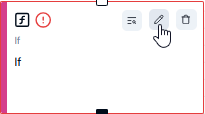
- The function’s Edit panel appears:
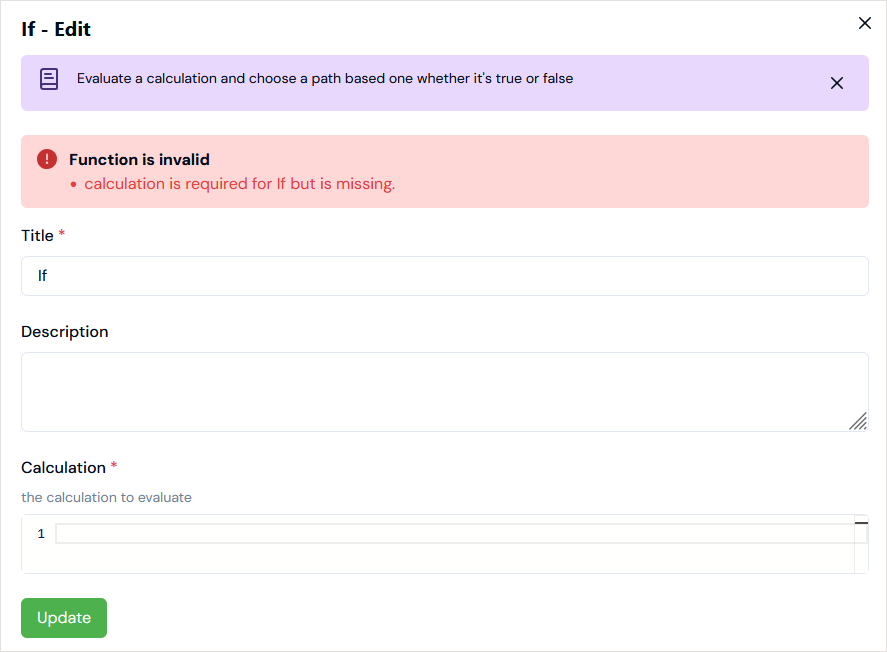
- An information text explains what the function is used for, which you can collapse.
- Since we’ve just added the function, any validation errors are listed at the top of the Edit panel.
- We can now configure the If function in accordance with our Workflow design for Step 1:
- Title. We’ll change this from the generic default to be specific for the Step: Is customer created event?
- Description. Optional setting and we’ll omit for the current worked example.
- Calculation. Add
body.event_type = "customer_created"as the condition to evaluate as TRUE or FALSE.
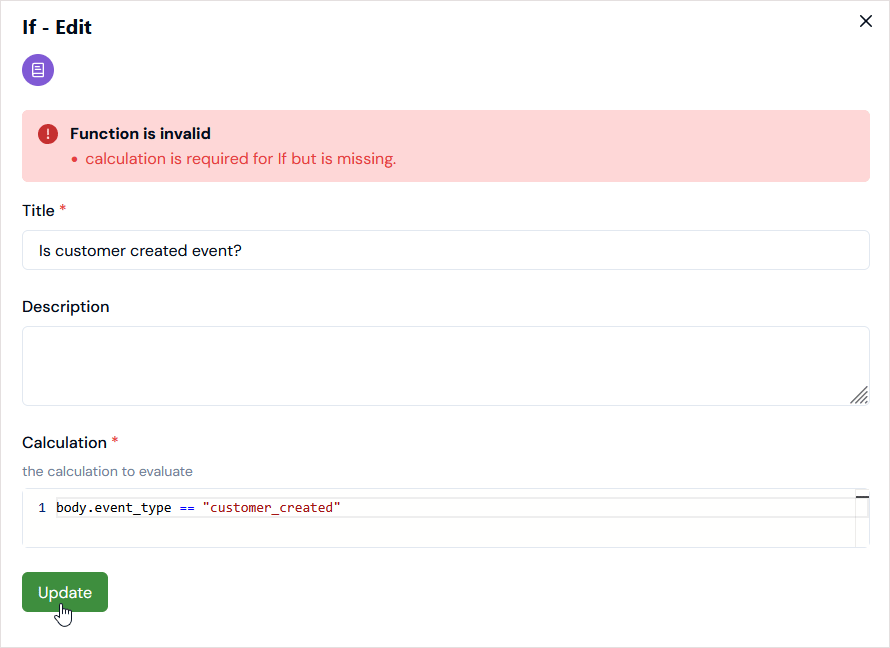
- Select Update. The Edit panel closes and you are returned to the Workflow. We now have the Step 1 function added to our Workflow and configured to meet the design solution.
- The function no longer shows an invalid alert flag and if we reopen the Edit panel, there are no validation errors.
- We can open a Function details card to check and review the function’s configuration:
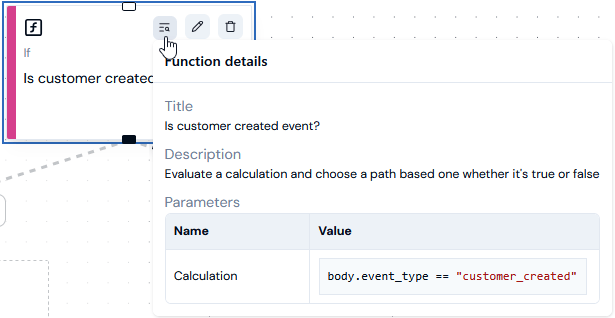
- Select Create. A published version of the Workflow is created and the Workflow remains open in Draft mode:
- You can continue to build the Workflow and Save draft changes as you proceed.
- Select to open the Published version at any time.
- When you’ve added further Workflow steps in Draft, you can Publish draft to update the Published version.
- After creating your Workflow, remain in Draft mode.
- Select Data Management on the Add function menu.
- Drag-and-drop an Apply Transformation function to create the next step in the Workflow:
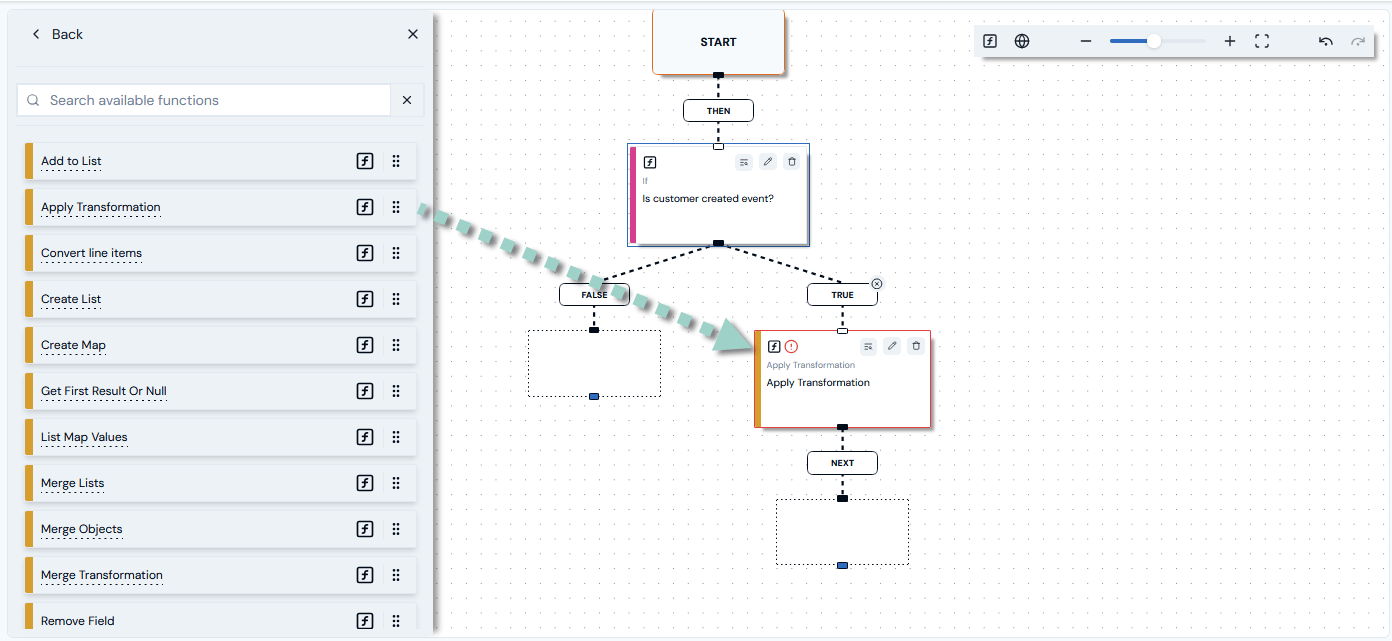
- Note that the function shows an alert flag and displays a red border when first added to the Workflow since not yet configured.
- Open the Edit panel for the Apply Transformation function and enter the required configuration details for our design solution:
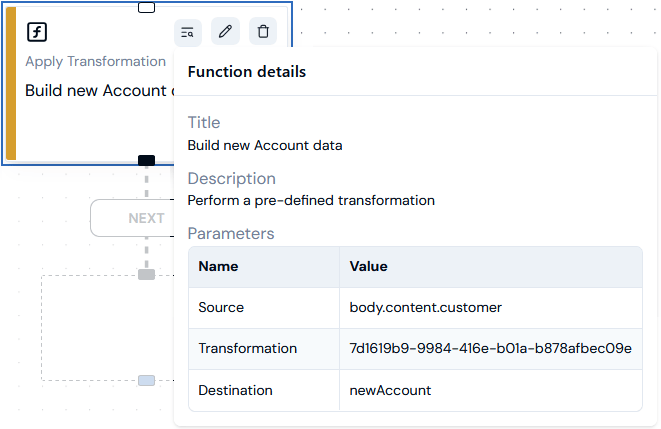
- Title. We’ll change this for a more specific title: Build new Account data
- Description. Optional setting and we’ll omit for the current worked example.
- Source. Name of variable by which name of the object to transform should be retrieved from state:
body.content.customer - Transformation. Select the Chargebee Customer → m3ter Account Transformation set up as a Workflow prerequisite.
- Destination. Name of the variable by which the transformed object will be stored in state:
newAccount
- Select Update. The Edit panel closes and you are returned to the Workflow. We now have the required Apply Transformation function added to our Workflow and configured to meet Step 1 of the Customer Created solution.
- We can open the Function details card to check the configuration:
- On the Add function menu, select m3ter API functions.
- Drag-and-drop a Create Account function to create the next step of the Customer Created branch of the Workflow.
- Open the Edit panel for the Create Account function and enter the required configuration details for our design solution:
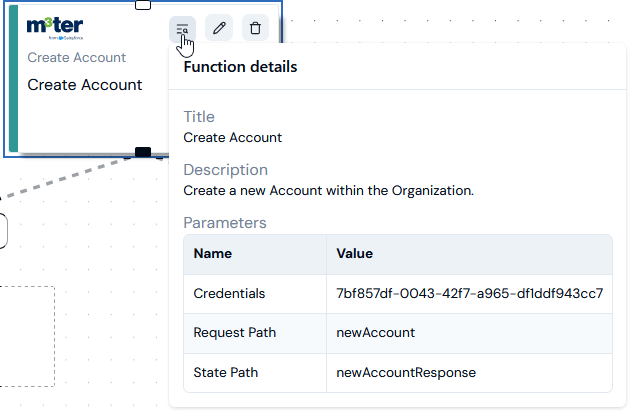
- Title. We’ll leave this as the default Create Account title since applicable for the current example.
- Credentials. Select the Service User Credential we set up as a prerequisite.
- Request Path. This is the state variable containing the request:
newAccount - Optional parameters:
- State Path. This is the state variable in which to store the response:
newAccountResponse
- State Path. This is the state variable in which to store the response:
- Select Update. The Edit panel closes and you are returned to the Workflow. We now have the required Create Account function added to our Workflow and configured to meet Step 2 of the Customer Created case:
- Lastly for this Workflow branch and as determined in our overall design solution to facilitate the Customer Updated or Customer Deleted cases, drag-and-drop a Create m3ter external mapping API function to create the final step of the Customer Created branch.
- Open the Edit panel for the Create m3ter external mapping function and enter the required configuration details for our design solution:
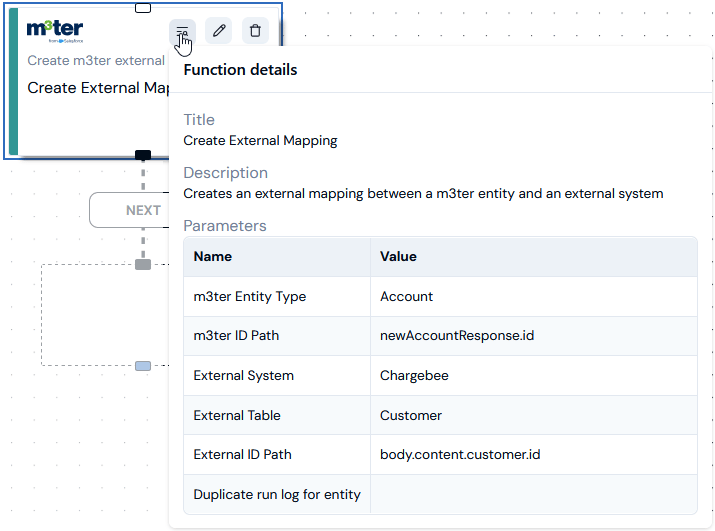
- Title. Edit this to Create External Mapping.
- Description. Optional setting and we’ll omit for the current worked example.
- m3ter Entity Type. Use the drop-down to select Account.
- m3ter ID Path. This is the path of the m3ter UUID to look up in the state:
newAccountResponse.id - External System. Use the drop-down to select Chargebee.
- External Table. Enter Customer.
- External ID Path. This is the path of the external ID to lookup in the state:
body.content.customer.id. - Optional parameters. This function gives you a Duplicate run log for entity option. For the current example, we’ll leave this option disabled.
- Select Update. The Edit panel closes and you are returned to the Workflow. We now have the required Create External Mapping function added to our Workflow and configured to meet Step 3 of the Customer Created case.
- We can open the Function details card to check the configuration:
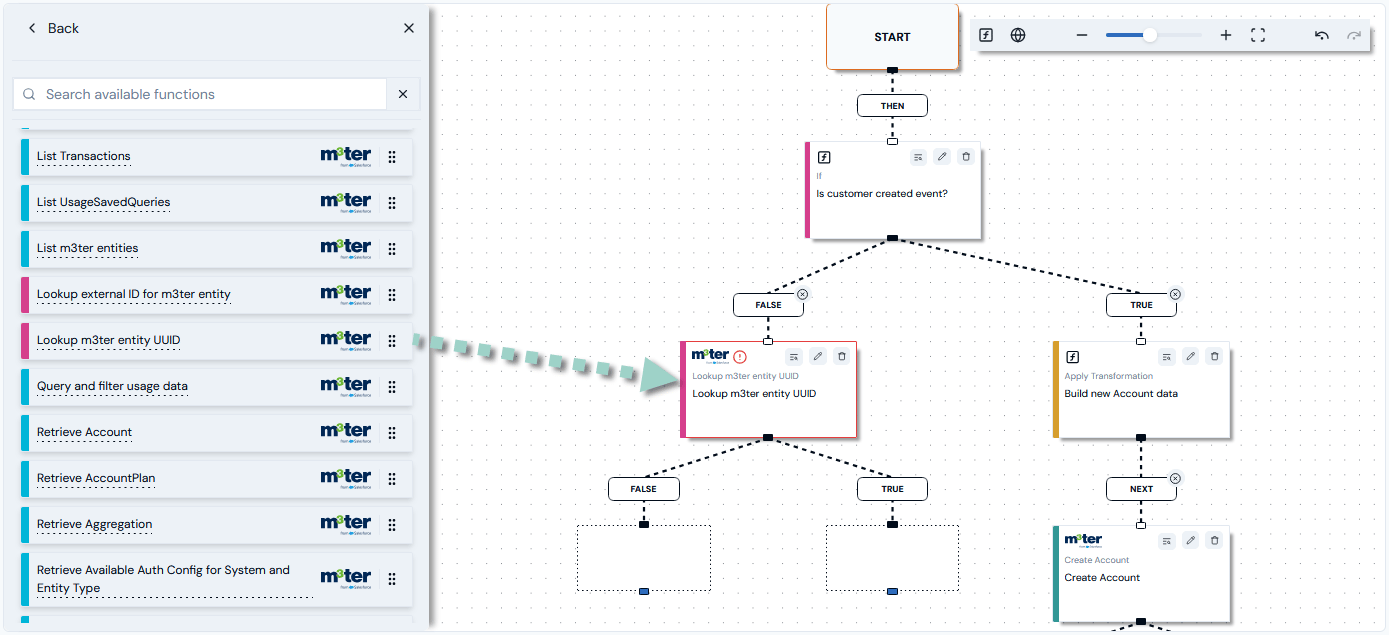
- In the Add function menu, select m3ter APIs.
- Scroll down the READ functions and drag-and-drop a Lookup m3ter entity UUID function to create the first step in the FALSE branch of the Workflow:
- Open the Edit panel for the Lookup m3ter entity UUID function and enter the required configuration details for our design solution:
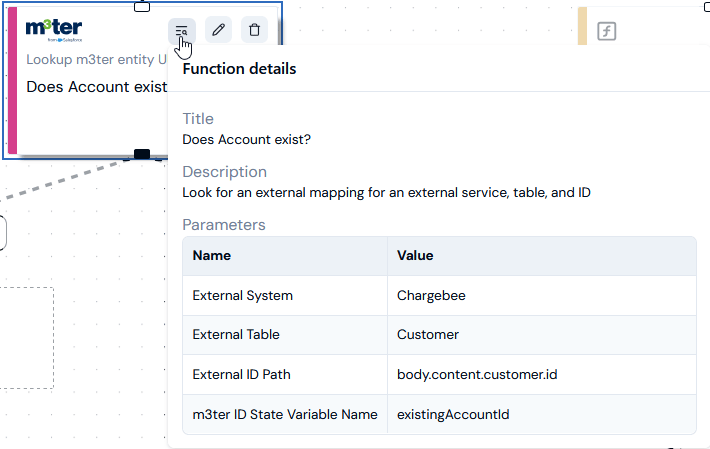
- Title. Enter a descriptive title for the role of this function: Does Account exist?
- Description. Optional setting and we’ll omit for the current worked example.
- External System. Use the drop-down to select Chargebee.
- External Table. Enter Customer.
- External ID Path. This is the path of the external ID to lookup in the state:
body.content.customer.id - Optional parameters. Use the m3ter ID State Variable Name option to save the m3ter UUID to the state:
existingAccountId
- Select Update. The Edit panel closes and you are returned to the Workflow. We now have the required Does Account exist? function added to our Workflow and configured to meet Step 1 of the Customer Changed case.
- We can open the Function details card to check the configuration:
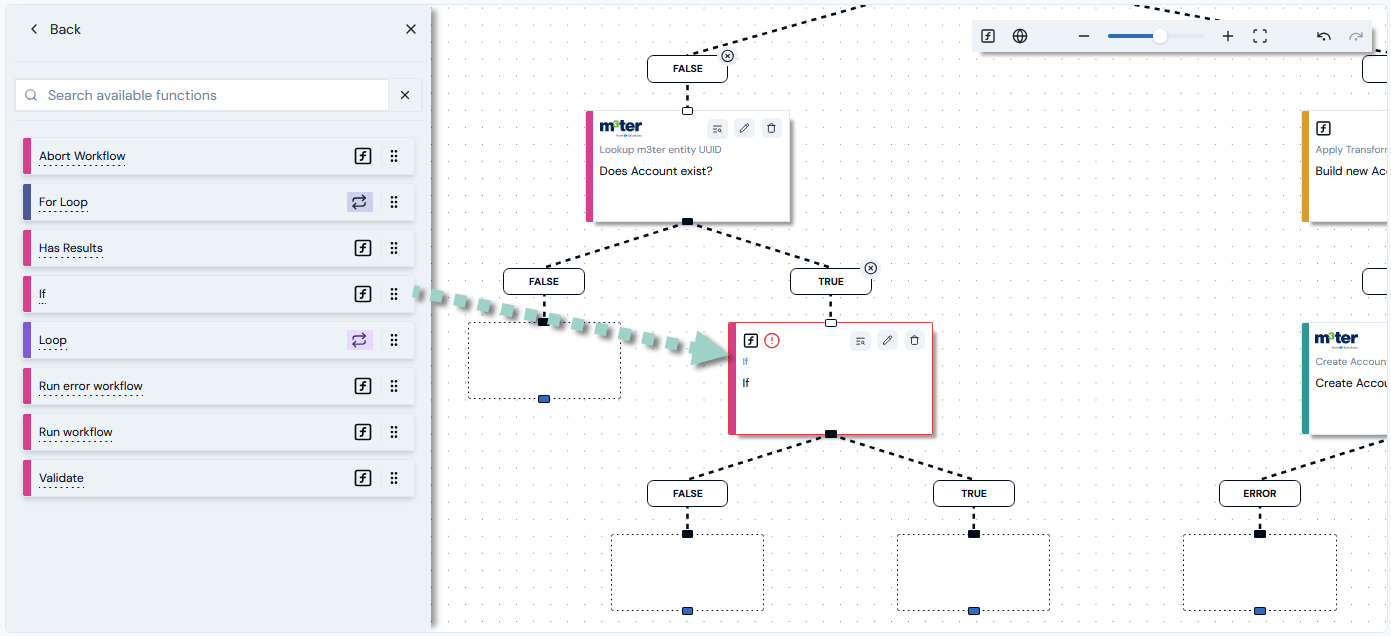
- On the Add function menu select the Logic functions and drag-and-drop an If function onto the TRUE branch outcome of the previous Does Account exist? step:
- Open the Edit panel for the If function and enter the required configuration details for our design solution:
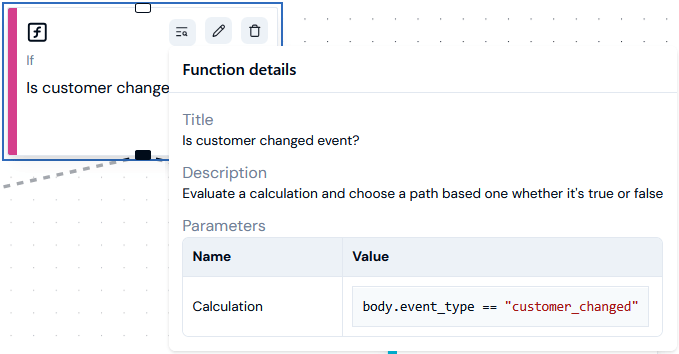
- Title. Enter a descriptive title for the role of this function: Is customer changed event?
- Description. Optional setting and we’ll omit for the current worked example.
- Calculation. Add
body.event_type == "customer_changed"as the condition to evaluate as TRUE or FALSE.
- Select Update. The Edit panel closes and you are returned to the Workflow. We now have the required Is customer changed event? function added to our Workflow and configured to meet Step 2 of the Customer Changed case.
- We can open the Function details card to check the configuration:
- In the Add function menu, select m3ter APIs.
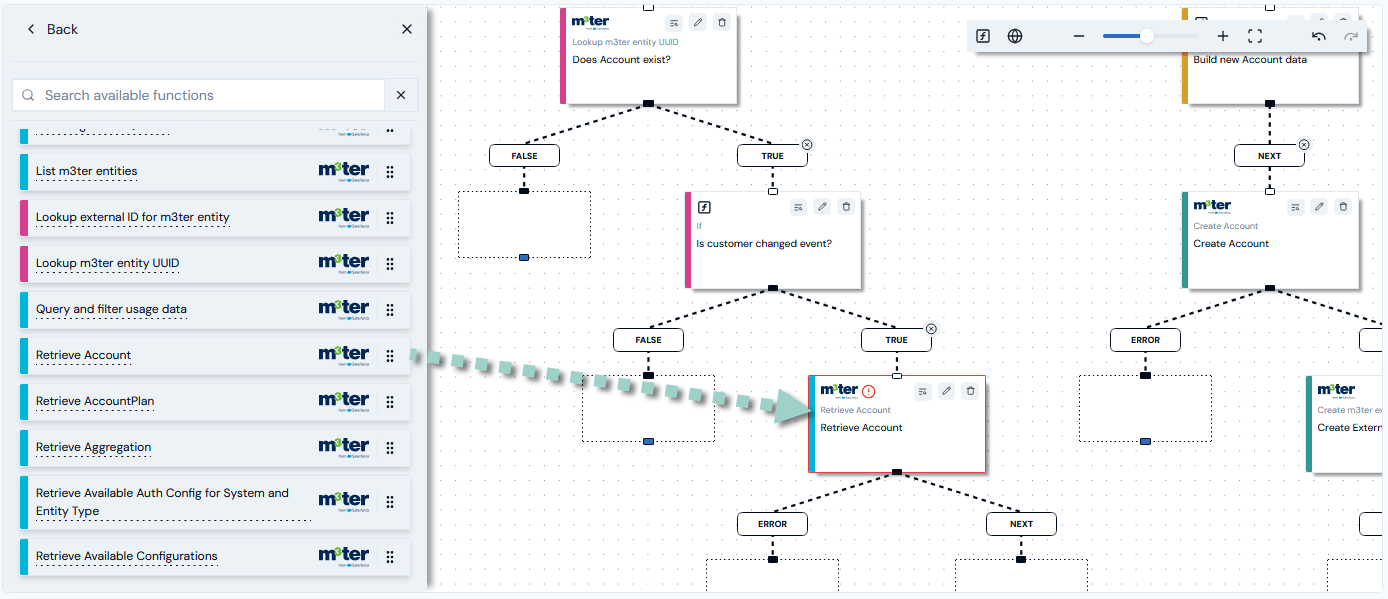
- Drag-and-drop a Retrieve Account function onto the first node of the TRUE branch for the previous Is customer changed event? step:
- Open the Edit panel for the Retrieve Account function and enter the required configuration details for our design solution:
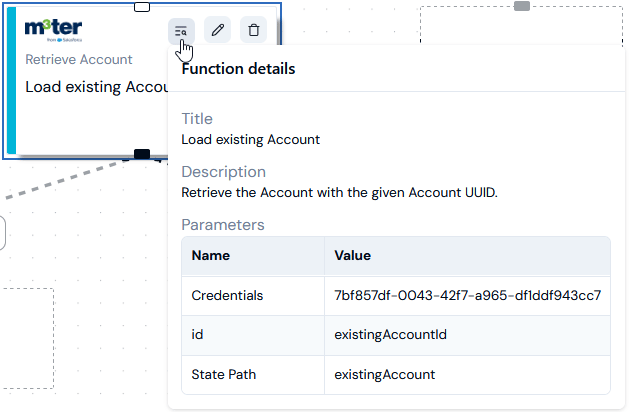
- Title. Enter a descriptive title for the role of this function: Load existing Account
- Description. Optional setting and we’ll omit for the current worked example.
- Credentials. Select the Service User Credential we set up as a prerequisite.
- id. Select State path as the Lookup type and then enter
existingAccountIdas the Value. - Optional parameters. For the state variable in which to store the response, enter
existingAccountfor State Path.
- Select Update. The Edit panel closes and you are returned to the Workflow. We now have the required Load existing Account function added to our Workflow and configured to meet Step 1 of the Customer Updated case.
- We can open the Function details card to check the configuration:
- On the Add function menu, select Data management and drag-and-drop an Apply Transformation function to create the next step on this branch of the Workflow:
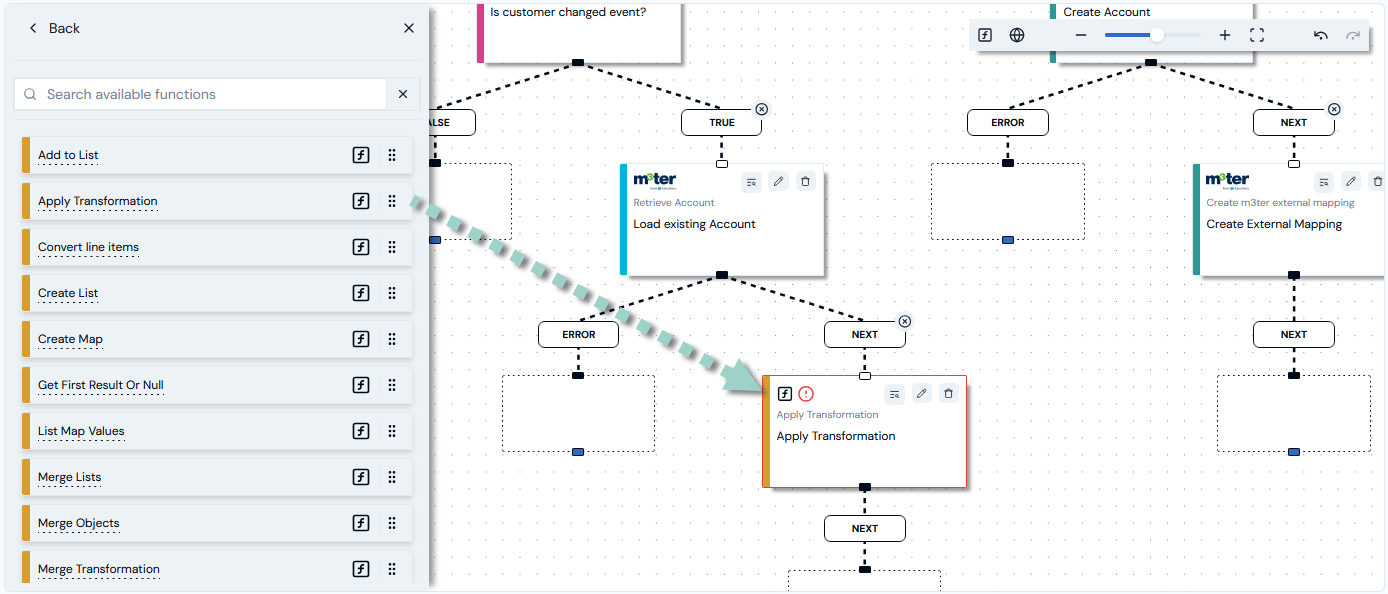
- Open the Edit panel for the Apply Transformation function and enter the required configuration details for our design solution:
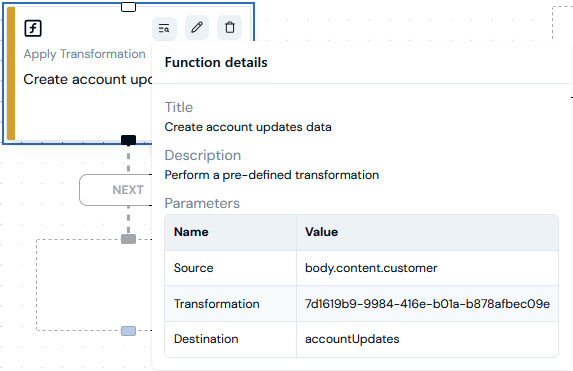
- Title. Enter a descriptive title for the role of this function: Create account updates data
- Description. Optional setting and we’ll omit for the current worked example.
- Source. This is the variable by which name of the object to transform should be retrieved from state:
body.content.customer - Transformation. Select the Chargebee Customer → m3ter Account Transformation set up as a Workflow prerequisite.
- Destination. Name of the variable by which the transformed object will be stored in state:
accountUpdates
- Select Update. The Edit panel closes and you are returned to the Workflow. We now have the required Create account updates data function added to our Workflow and configured to meet Step 2 of the Customer Updated case.
- We can open the Function details card to check the configuration:
- From Data Management functions, drag-and-drop a Set Multiple Fields function to create the next step in this branch of the Workflow.
- Open the Edit panel for the Set Multiple Fields function and enter the required configuration details for our design solution:
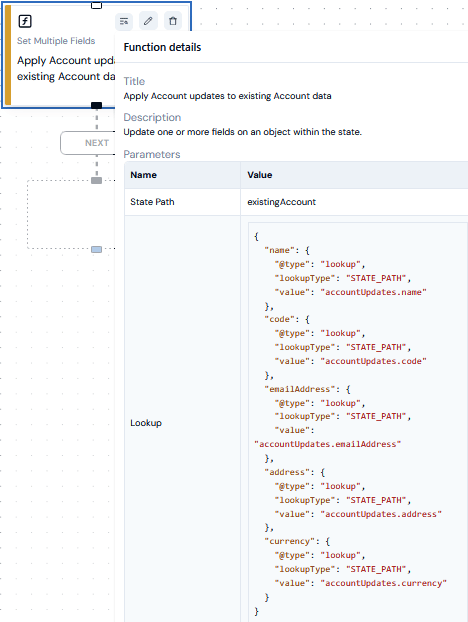
- Title. Enter a descriptive title for the role of this function: Apply Account updates to existing Account data
- Description. Optional setting and we’ll omit for the current worked example.
- State Path. This is the path to the object within the state to update:
existingAccount - Lookup. Add five Lookups:
- #1
- Key. name
- Lookup type. State path
- Value.
accountUpdates.name
- #2
- Key. code
- Lookup type. State path
- Value.
accountUpdates.code
- #3
- Key. emailAddress
- Lookup type. State path
- Value.
accountUpdates.emailAddress
- #4
- Key. address
- Lookup type. State path
- Value.
accountUpdates.address
- #5
- Key. currency
- Lookup type. State path
- Value.
accountUpdates.currency
- #1
- Select Update. The Edit panel closes and you are returned to the Workflow. We now have the required Apply account updates to existing Account data function added to our Workflow and configured to meet Step 3 of the Customer Updated case.
- We can open the Function details card to check the configuration:
- Select m3ter APIs on the Add function menu and drag-and-drop an Update Account function to create the final step in this branch of the Workflow.
- Open the Edit panel for the Update Account function and enter the required configuration details for our design solution:
- Title. We can retain the default title for the role of this function: Update Account
- Description. Optional setting and we’ll omit for the current worked example.
- Credentials. Select the Service User Credential we set up as a prerequisite.
- id. Select State path as the Lookup type and then enter
existingAccountIdas the Value. - Request Path. This is the state variable containing the request:
existingAccount - Optional parameters. For State Path, enter
updateAccountResponseas the state variable in which to store the response.
- Select Update. The Edit panel closes and you are returned to the Workflow. We now have the required Update Account function added to our Workflow and configured to meet Step 4 of the Customer Updated case.
- We can open the Function details card to check the configuration:
- In the Add function menu, select Logic.
- Drag-and-drop an If function onto the first node of the FALSE branch for the previous Is customer changed event? step:
- Open the Edit panel for the If function and enter the required configuration details for our design solution:
- Title. Enter a descriptive title for the role of this function: Is customer deleted?
- Description. Optional setting and we’ll omit for the current worked example.
- Calculation. Add
body.event_type == "customer_deleted"as the condition to evaluate as TRUE or FALSE.
- Select Update. The Edit panel closes and you are returned to the Workflow. We now have the required Is customer deleted? function added to our Workflow and configured to meet Step 1 of the Customer Deleted case.
- We can open the Function details card to check the configuration:
- On the Add function menu, select m3ter APIs.
- Drag-and-drop a Delete Account function onto the first node of the TRUE branch of the previous Is customer deleted? function.
- Open the Edit panel for the Delete Account function and enter the required configuration details for our design solution:
- Title. We can retain the default title for the role of this function: Delete Account
- Description. Optional setting and we’ll omit for the current worked example.
- Credentials. Select the Service User Credential we set up as a prerequisite.
- id. Select State path as the Lookup type and then enter
existingAccountIdas the Value. - Optional parameters. For State Path, enter
deletedAccountResponseas the state variable in which to store the response.
- Select Update. The Edit panel closes and you are returned to the Workflow. We now have the required Delete Account function added to our Workflow and configured to meet Step 2 of the Customer Deleted case.
- We can open the Function details card to check the configuration:
- We now have a Workflow with all required steps required under the design solution for the worked example. To complete the Workflow, we must now add a Webhook trigger to the Workflow - see the following section.
Adding and Configuring a Workflow Webhook Trigger
To complete the Workflow set up, we can now add a Webhook trigger to the Workflow. When you add a webhook trigger to a Workflow, you have the option to select users in your Organization that you want to receive an email notification if the trigger is disabled. To add and configure a Workflow Webhook trigger:- Select m3sh. The Workflows page opens.
- Select the Name hotlink text of the Workflow you want to add a trigger to. The Workflow opens in Draft mode.
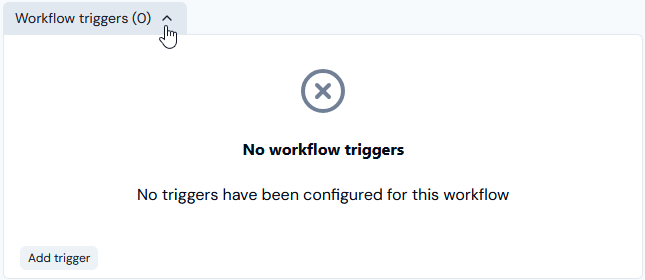
- Select Workflow triggers. In the current worked example, no triggers have yet been added for the Workflow:
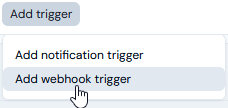
- Select Add trigger>Add webhook trigger:
- An Add webhook trigger dialog appears:
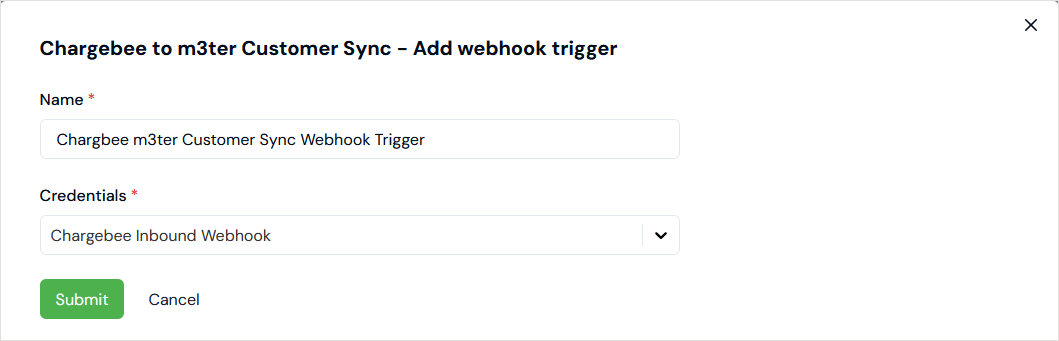
- Enter a Name for the webhook trigger.
- Use the Credentials drop-down to select the Credential you want to use to authenticate with the Workflow. For the current worked example, we’ve selected the Incoming Webhook Credential we set up above - see Creating Incoming Webhook Credential.
- Select Submit. The selected webhook trigger is listed under Workflow triggers:

- For the selected INCOMING WEBHOOK, you can check:
- The URL and copy it to your clipboard.
- Whether the webhook is ACTIVE or INACTIVE.
- If you want to set up users in you Organization to receive an email notification when the trigger is disabled, select the Details icon:

- A Workflow trigger modal appears:
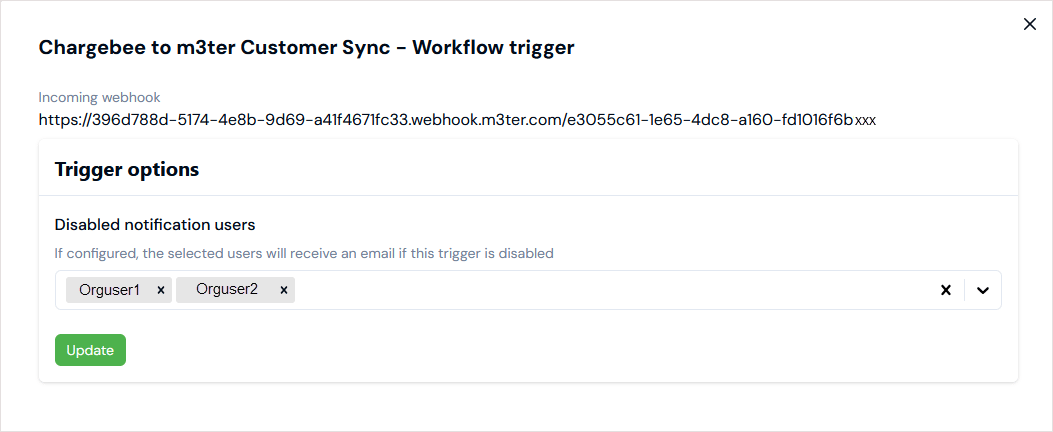
- Under Trigger options, use the Disabled notification users drop-down to add the Organization users you want to receive an email notification if the Workflow trigger is disabled.
Disabled Webhook Triggers: Webhook triggers are automatically disabled if the Workflow encounters errors in 20 consecutive runs via a trigger.
- Select Update. A message shows to confirm that the Trigger options for notifying Organization users were updated successfully.
- Select Publish draft. The Workflow is now ready to be tested - see the following section.
Testing the Workflow
To test the Workflow, we can perform test updates to customer account records in our external CRM system to cover the three cases we’ve designed the Workflow to sync data for in our m3ter Organization:- CASE 1 Customer Created
- CASE 2 Customer Changed
- CASE 2a Customer Updated
- CASE 2b Customer Deleted
- In your external CRM system, perform updates the following to customer account records: create a new customer account record, update a record, and delete a record.
- For the current example, we’ll perform the following sequence of updates in our Chargebee CRM to test our Workflow:
- First, create new customer account.
- Second, update this new customer account to change the Name and Code.
- Third, delete the updated customer account.
- Go back to the m3ter console and select m3sh. The Workflows page opens.
- Select the Name hotlink text of the Workflow you want to test. The Workflow opens in Draft mode.
- On the Latest workflow runs panel open the COMPLETED runs to review Workflow runs and check data syncing:
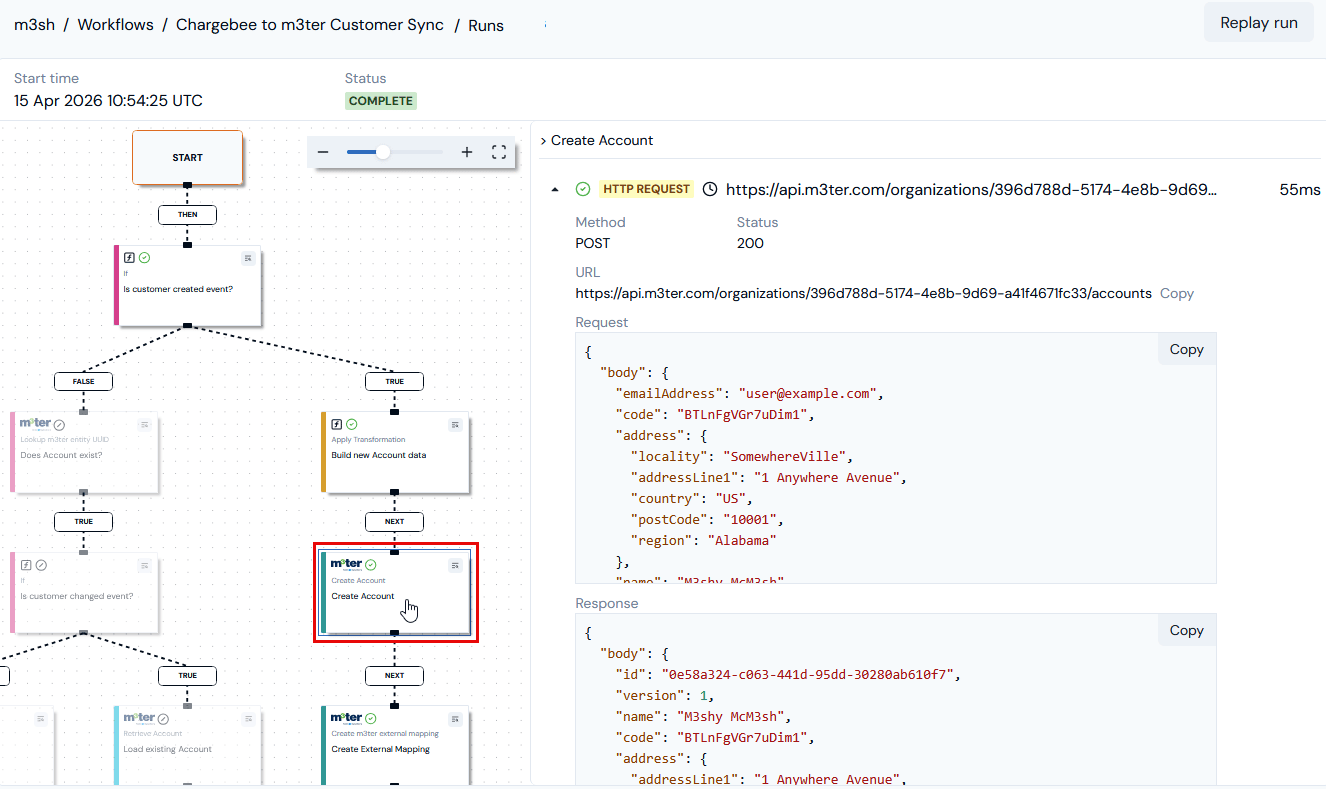
- We can see that the first step in the Workflow run using the Is customer created event? logic function evaluated to TRUE and the Workflow run has completed as designed. If we select the Create Account m3ter API function, we can check the Response to the call:
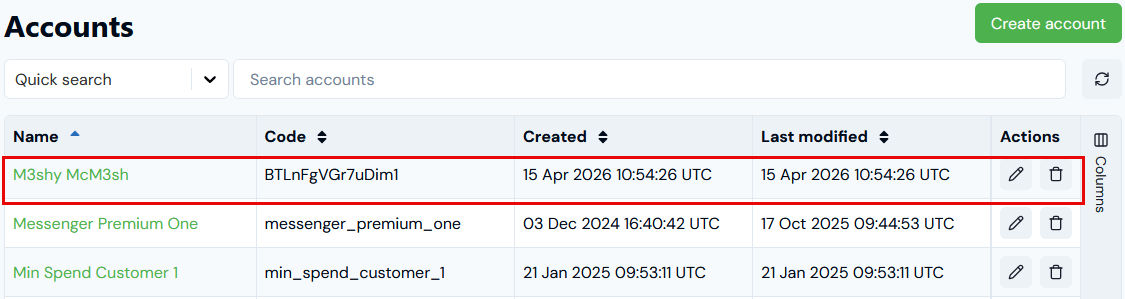
- If we now open the Accounts page in our m3ter Organization, we can confirm that a new Account with the correct Name and Code has been created:
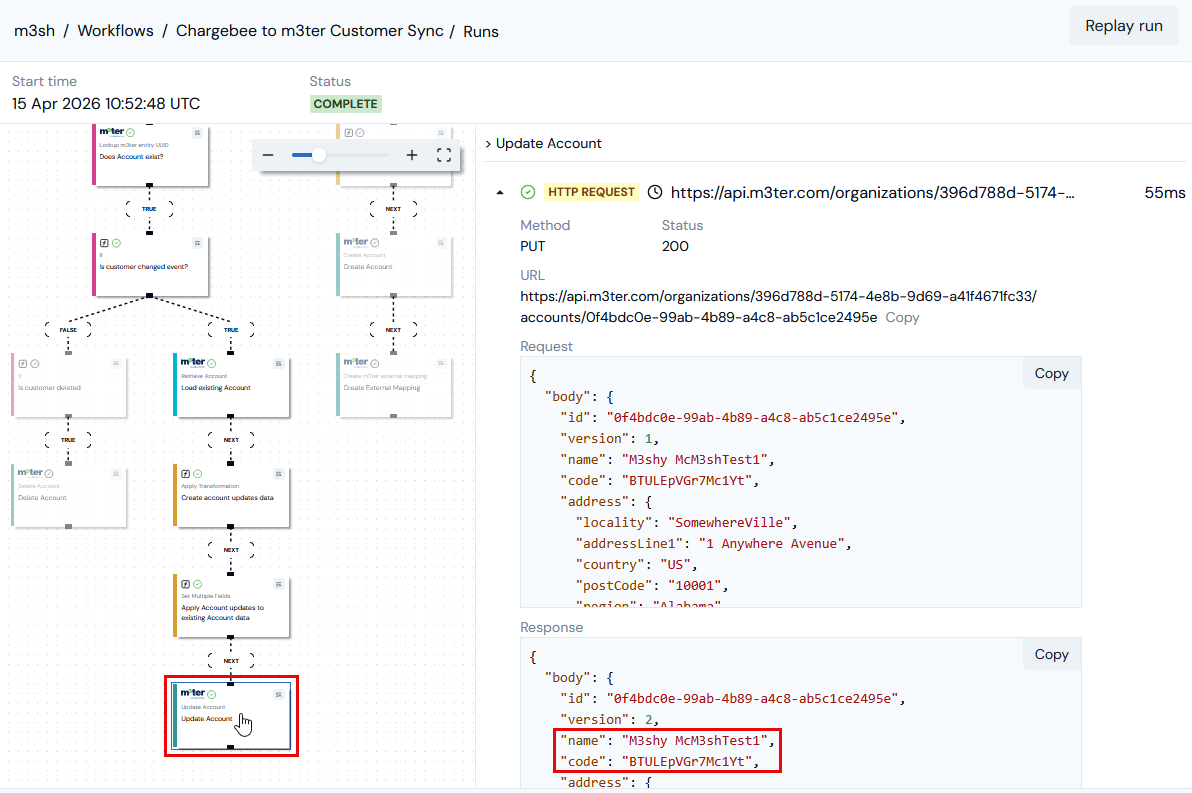
- We can see that the Is customer changed? step in the Workflow run evaluated to TRUE, and the run has completed as designed. If we then select the final step that uses an Update Account m3ter API function, the Response to he call shows the Account Name and Code have been updated:
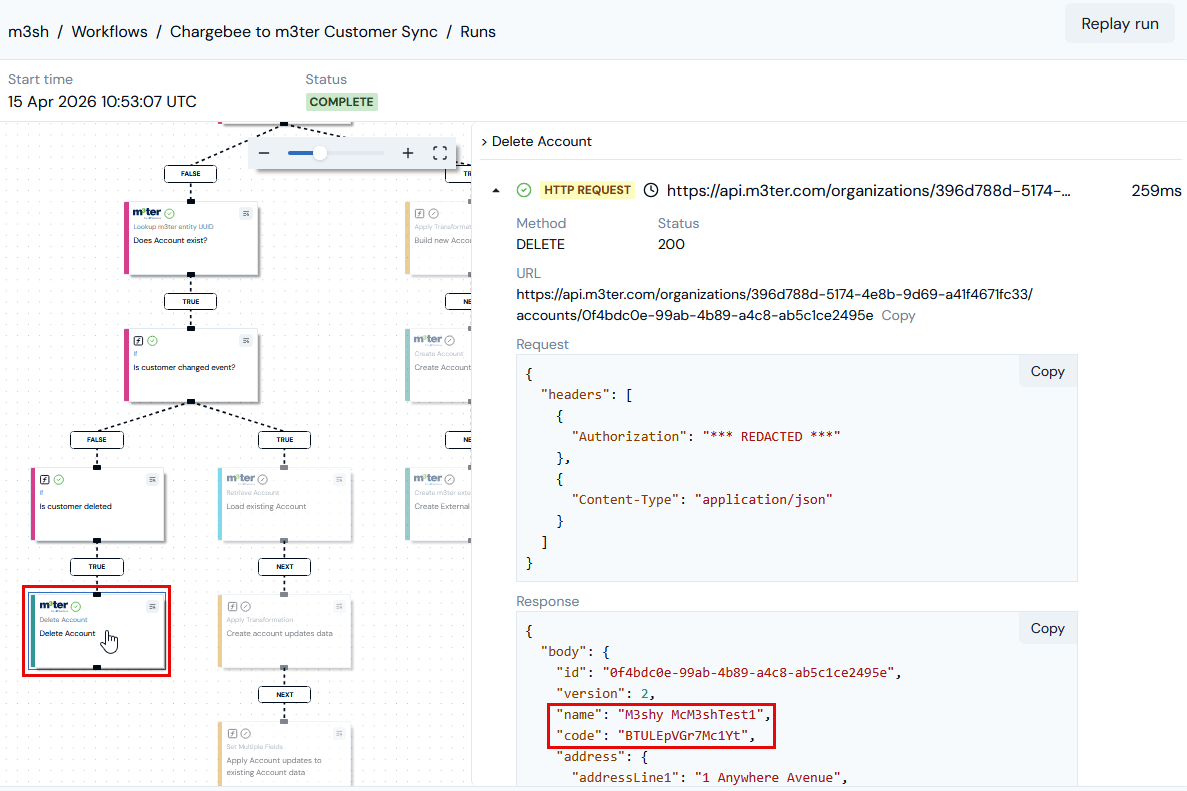
- We can see that the Is customer deleted? step in the Workflow run evaluated to TRUE. If we then select the final step that uses a Delete Account m3ter API function, the Response shows that the correct Account was deleted: